realtor

Hollin Hills Mid-Century Modern Flip by Jonathan Barnes

Nikon D200, Nikon 18-70mm f/3.5-4.5 AF-S DX @ 18mm, ISO 100, f/8, 1/15 sec.

Nikon D200, Nikon 18-70mm f/3.5-4.5 AF-S DX @ 18mm, ISO 100, f/8, 1/15 sec.

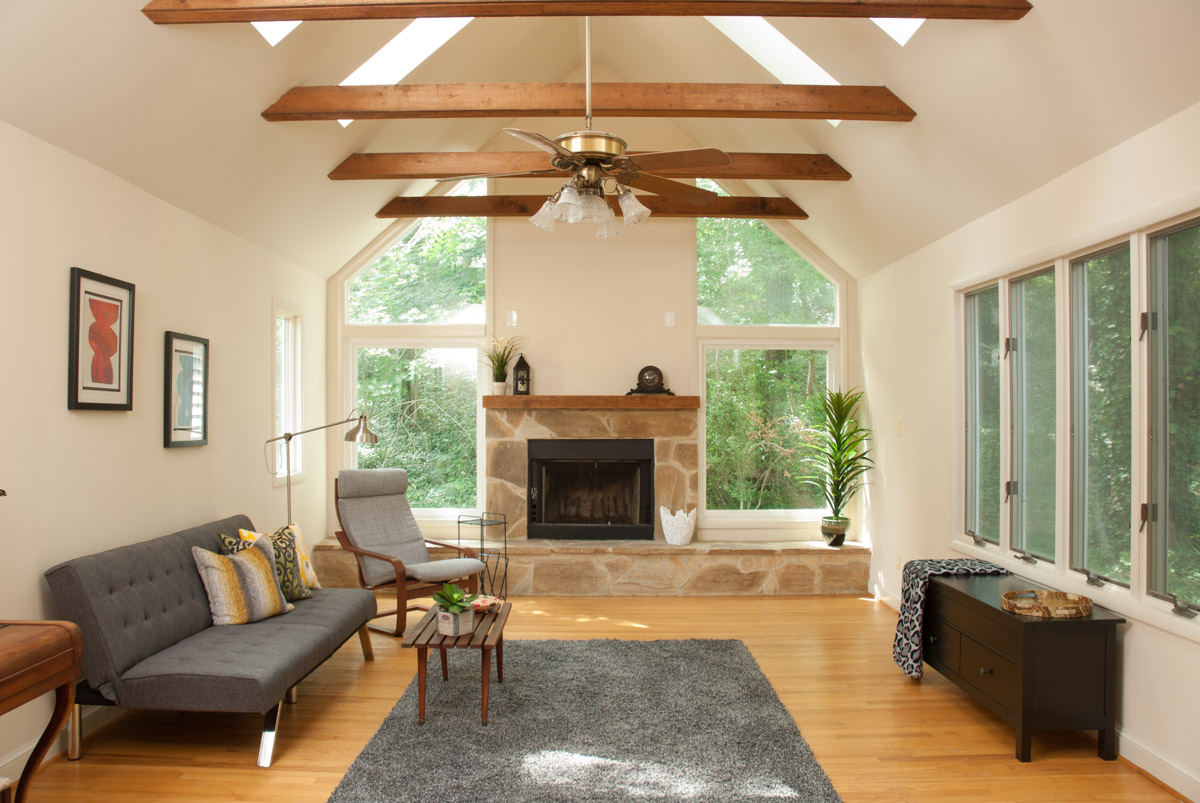
Hollin Hills is a unique little community situated a little south of Old Town Alexandria in Virginia. It was one of the first planned communities to be constructed after World War II. It is comprised entirely of mid-century modern homes designed by Charles Goodman, so when I found out that I would have the opportunity to photograph one of these homes, I was ecstatic.

Nikon D200, Nikon 18-70mm f/3.5-4.5 AF-S DX @ 25mm, ISO 400, f/7.1, 1/30 sec.

Nikon D200, Nikon 18-70mm f/3.5-4.5 AF-S DX @ 25mm, ISO 400, f/7.1, 1/30 sec.

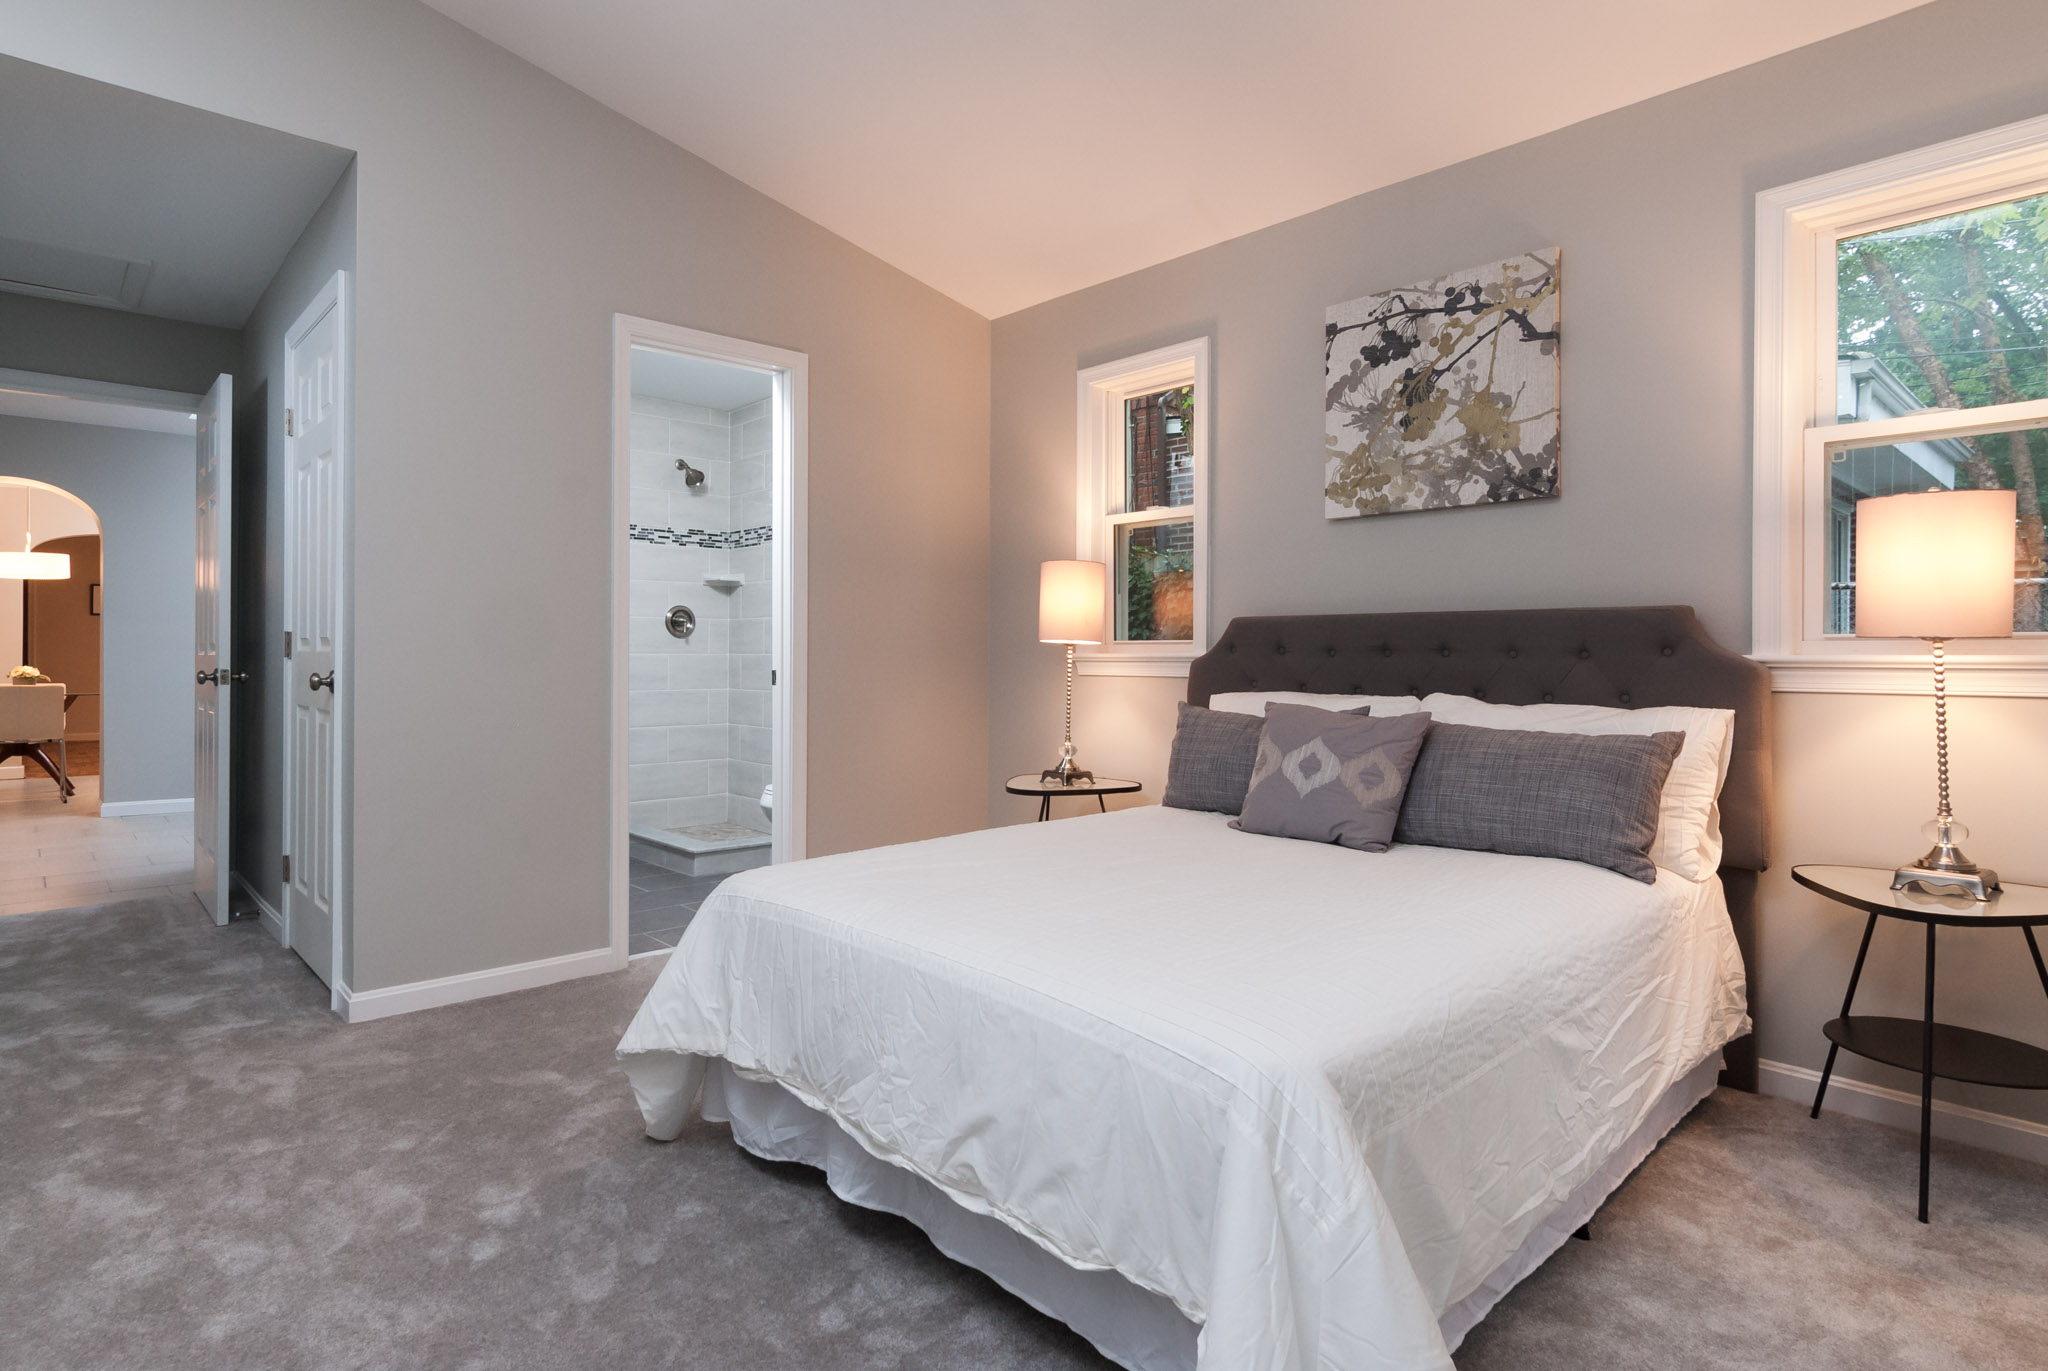
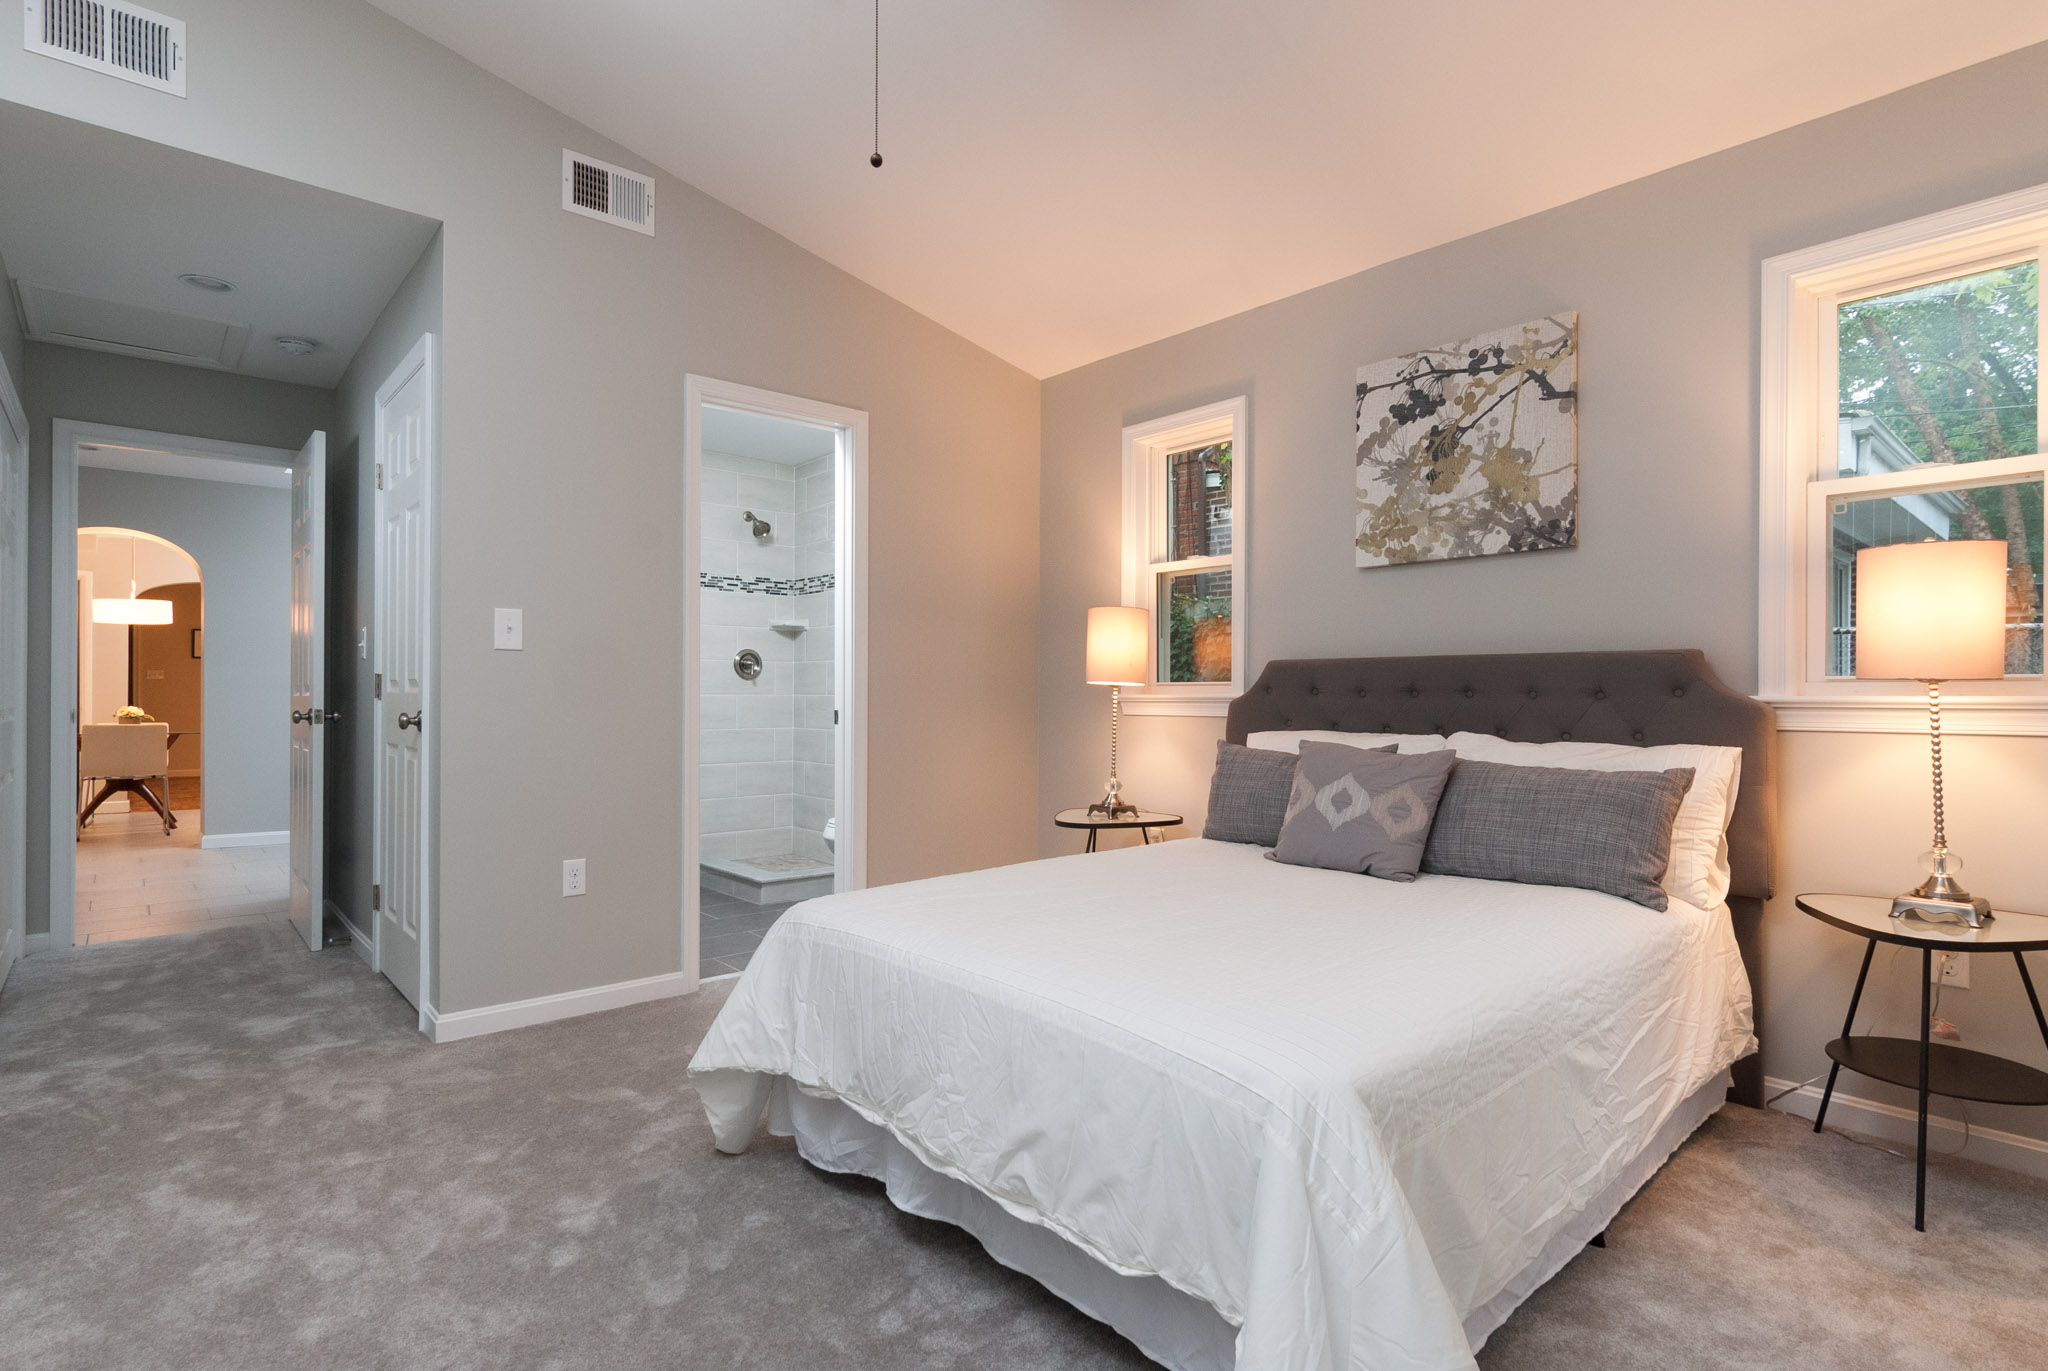
We'll be looking again today at the work of house flipper extraordinaire, Teresa Bosch. The bones of the house are the same as they were half a century ago, but Teresa and her team did a beautiful job of remodeling the home. I won't go as in-depth with the process on this one, but I do want to point out a few things that I had to do in order to create these photos.

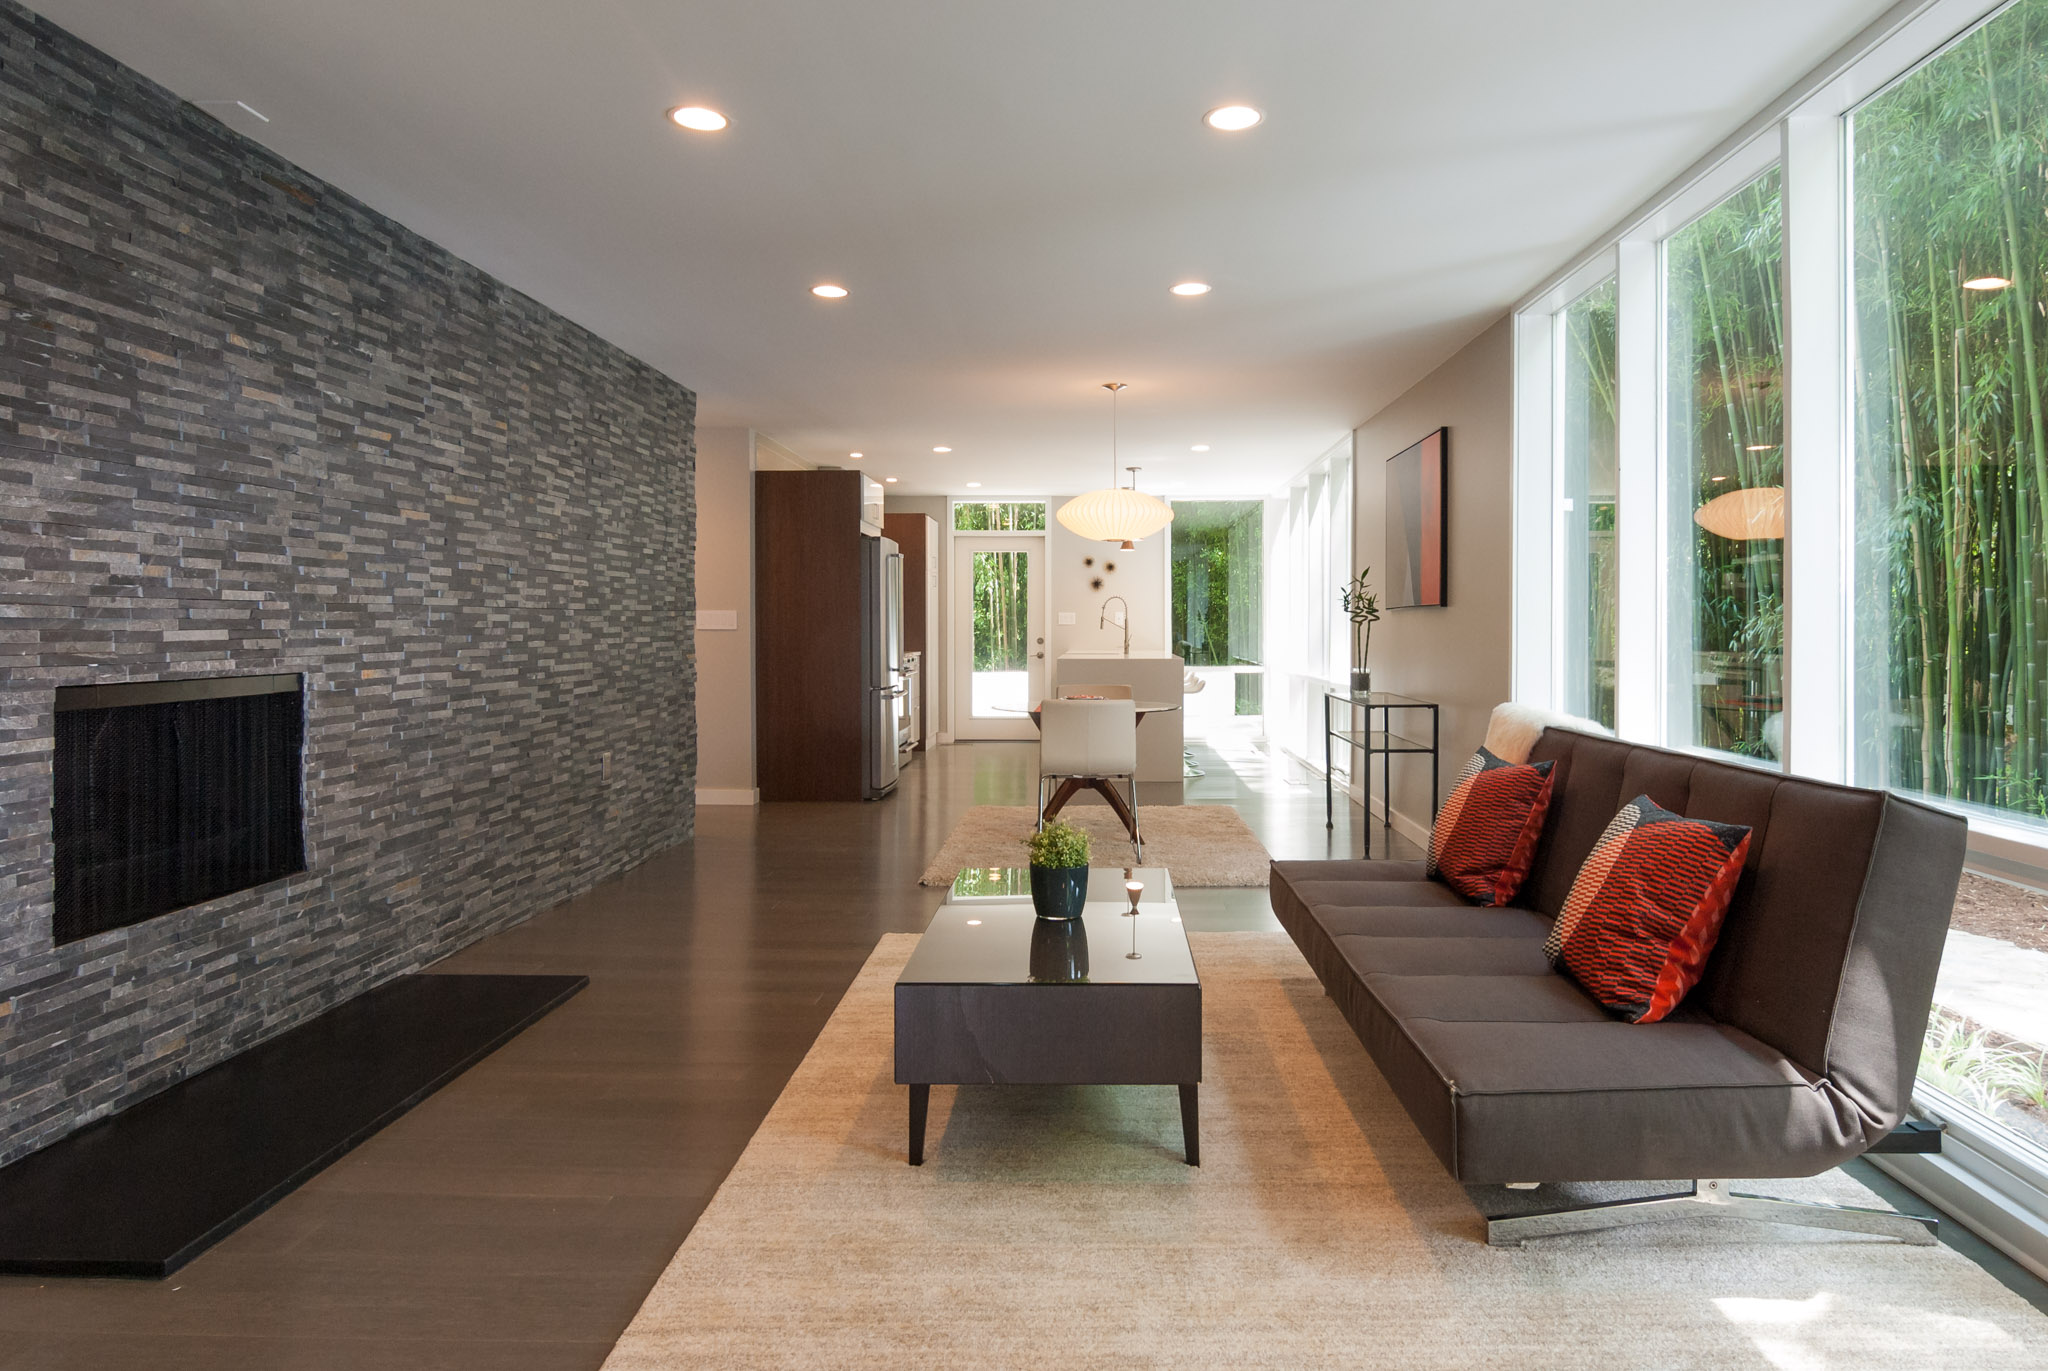
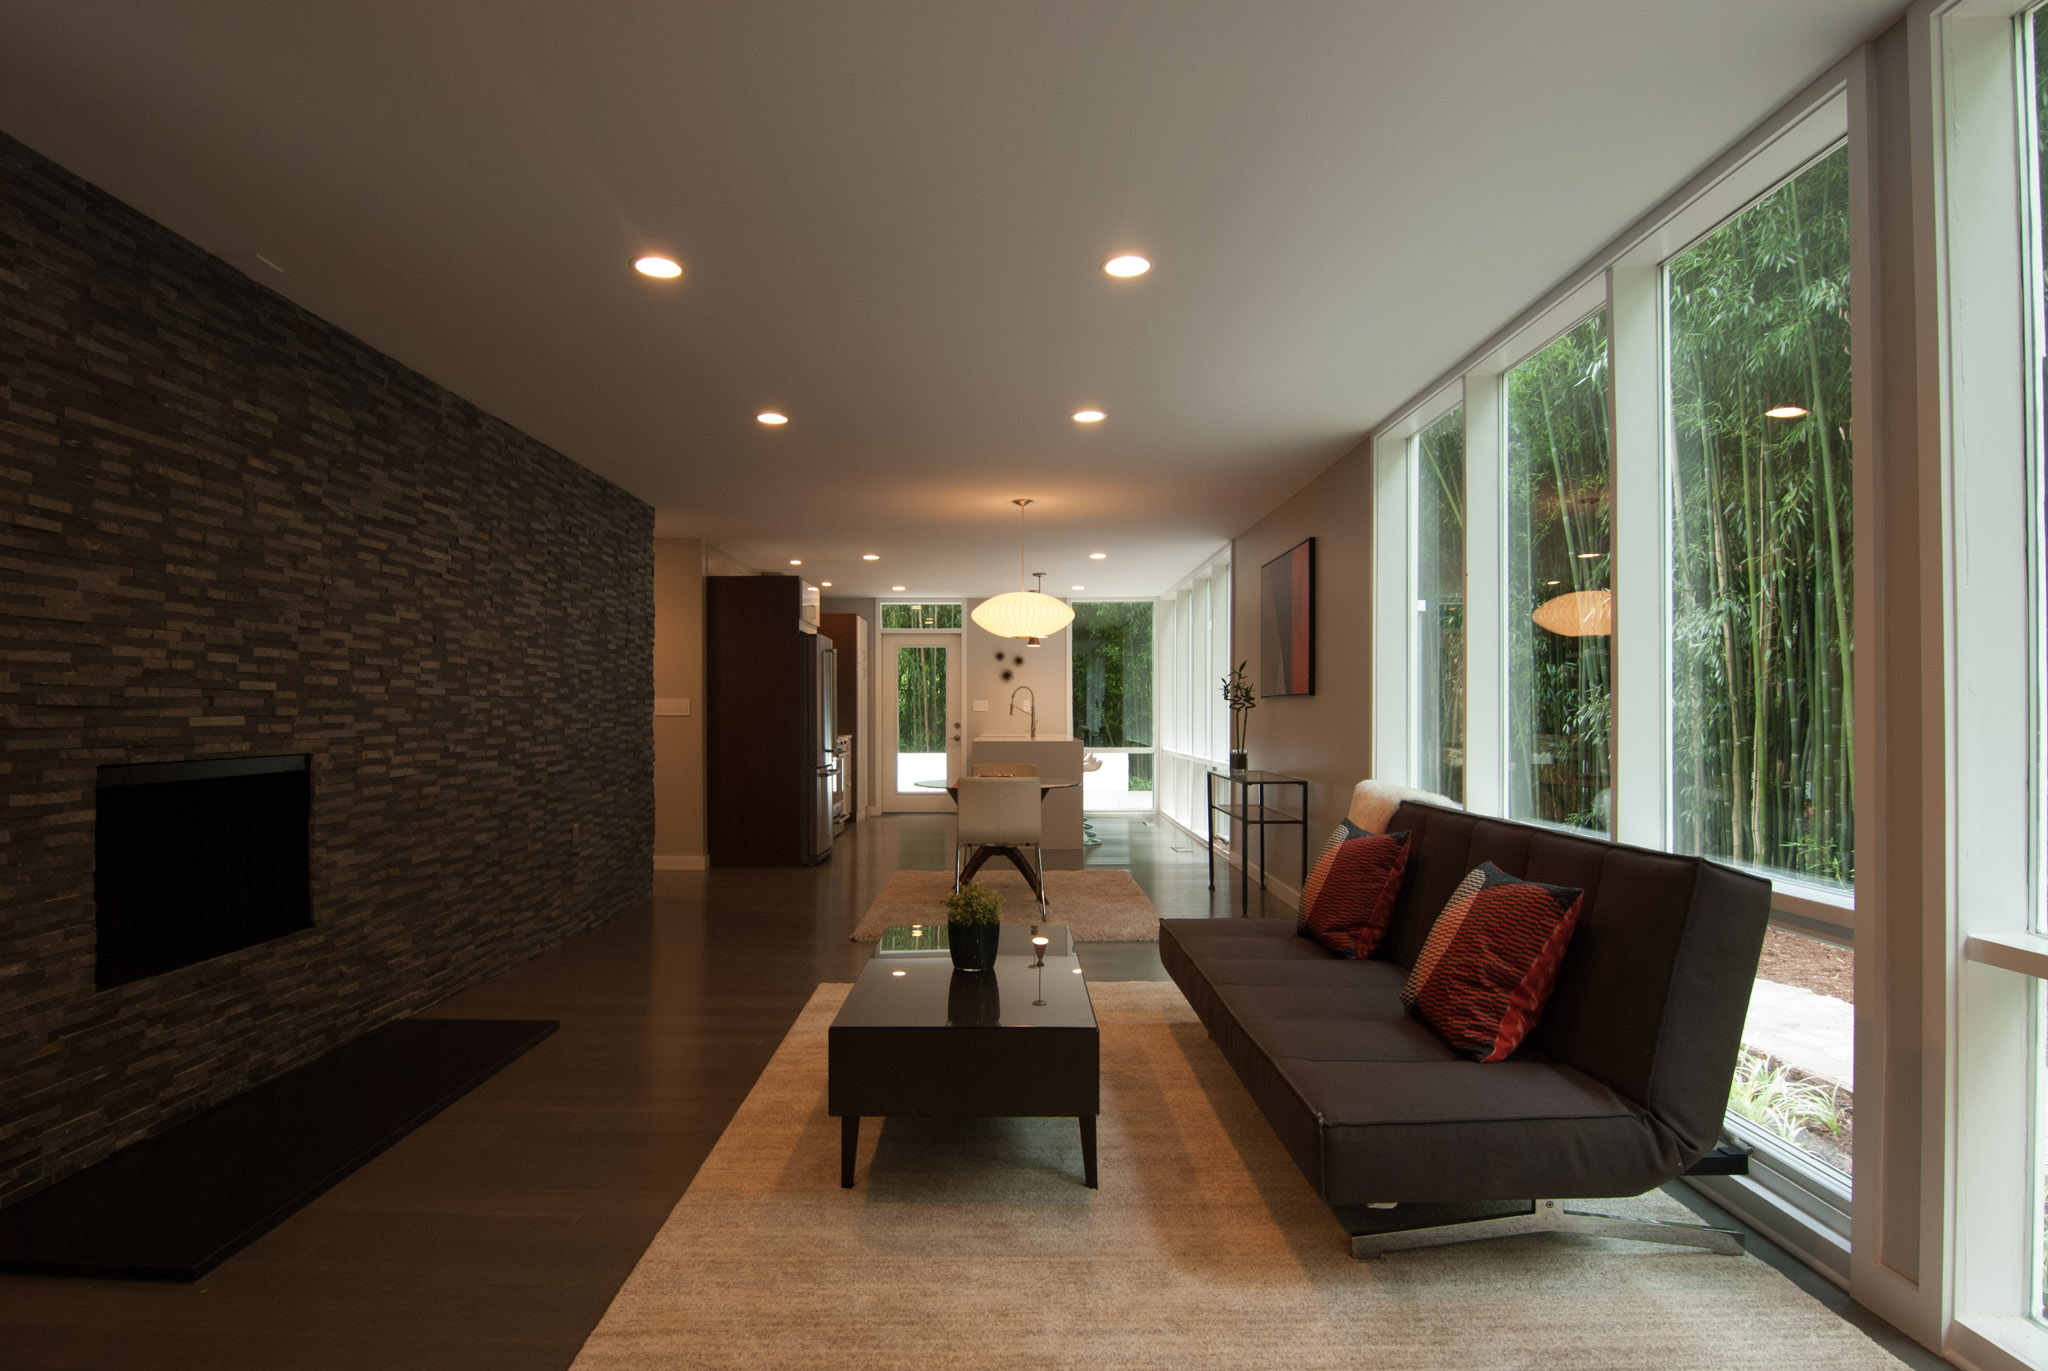
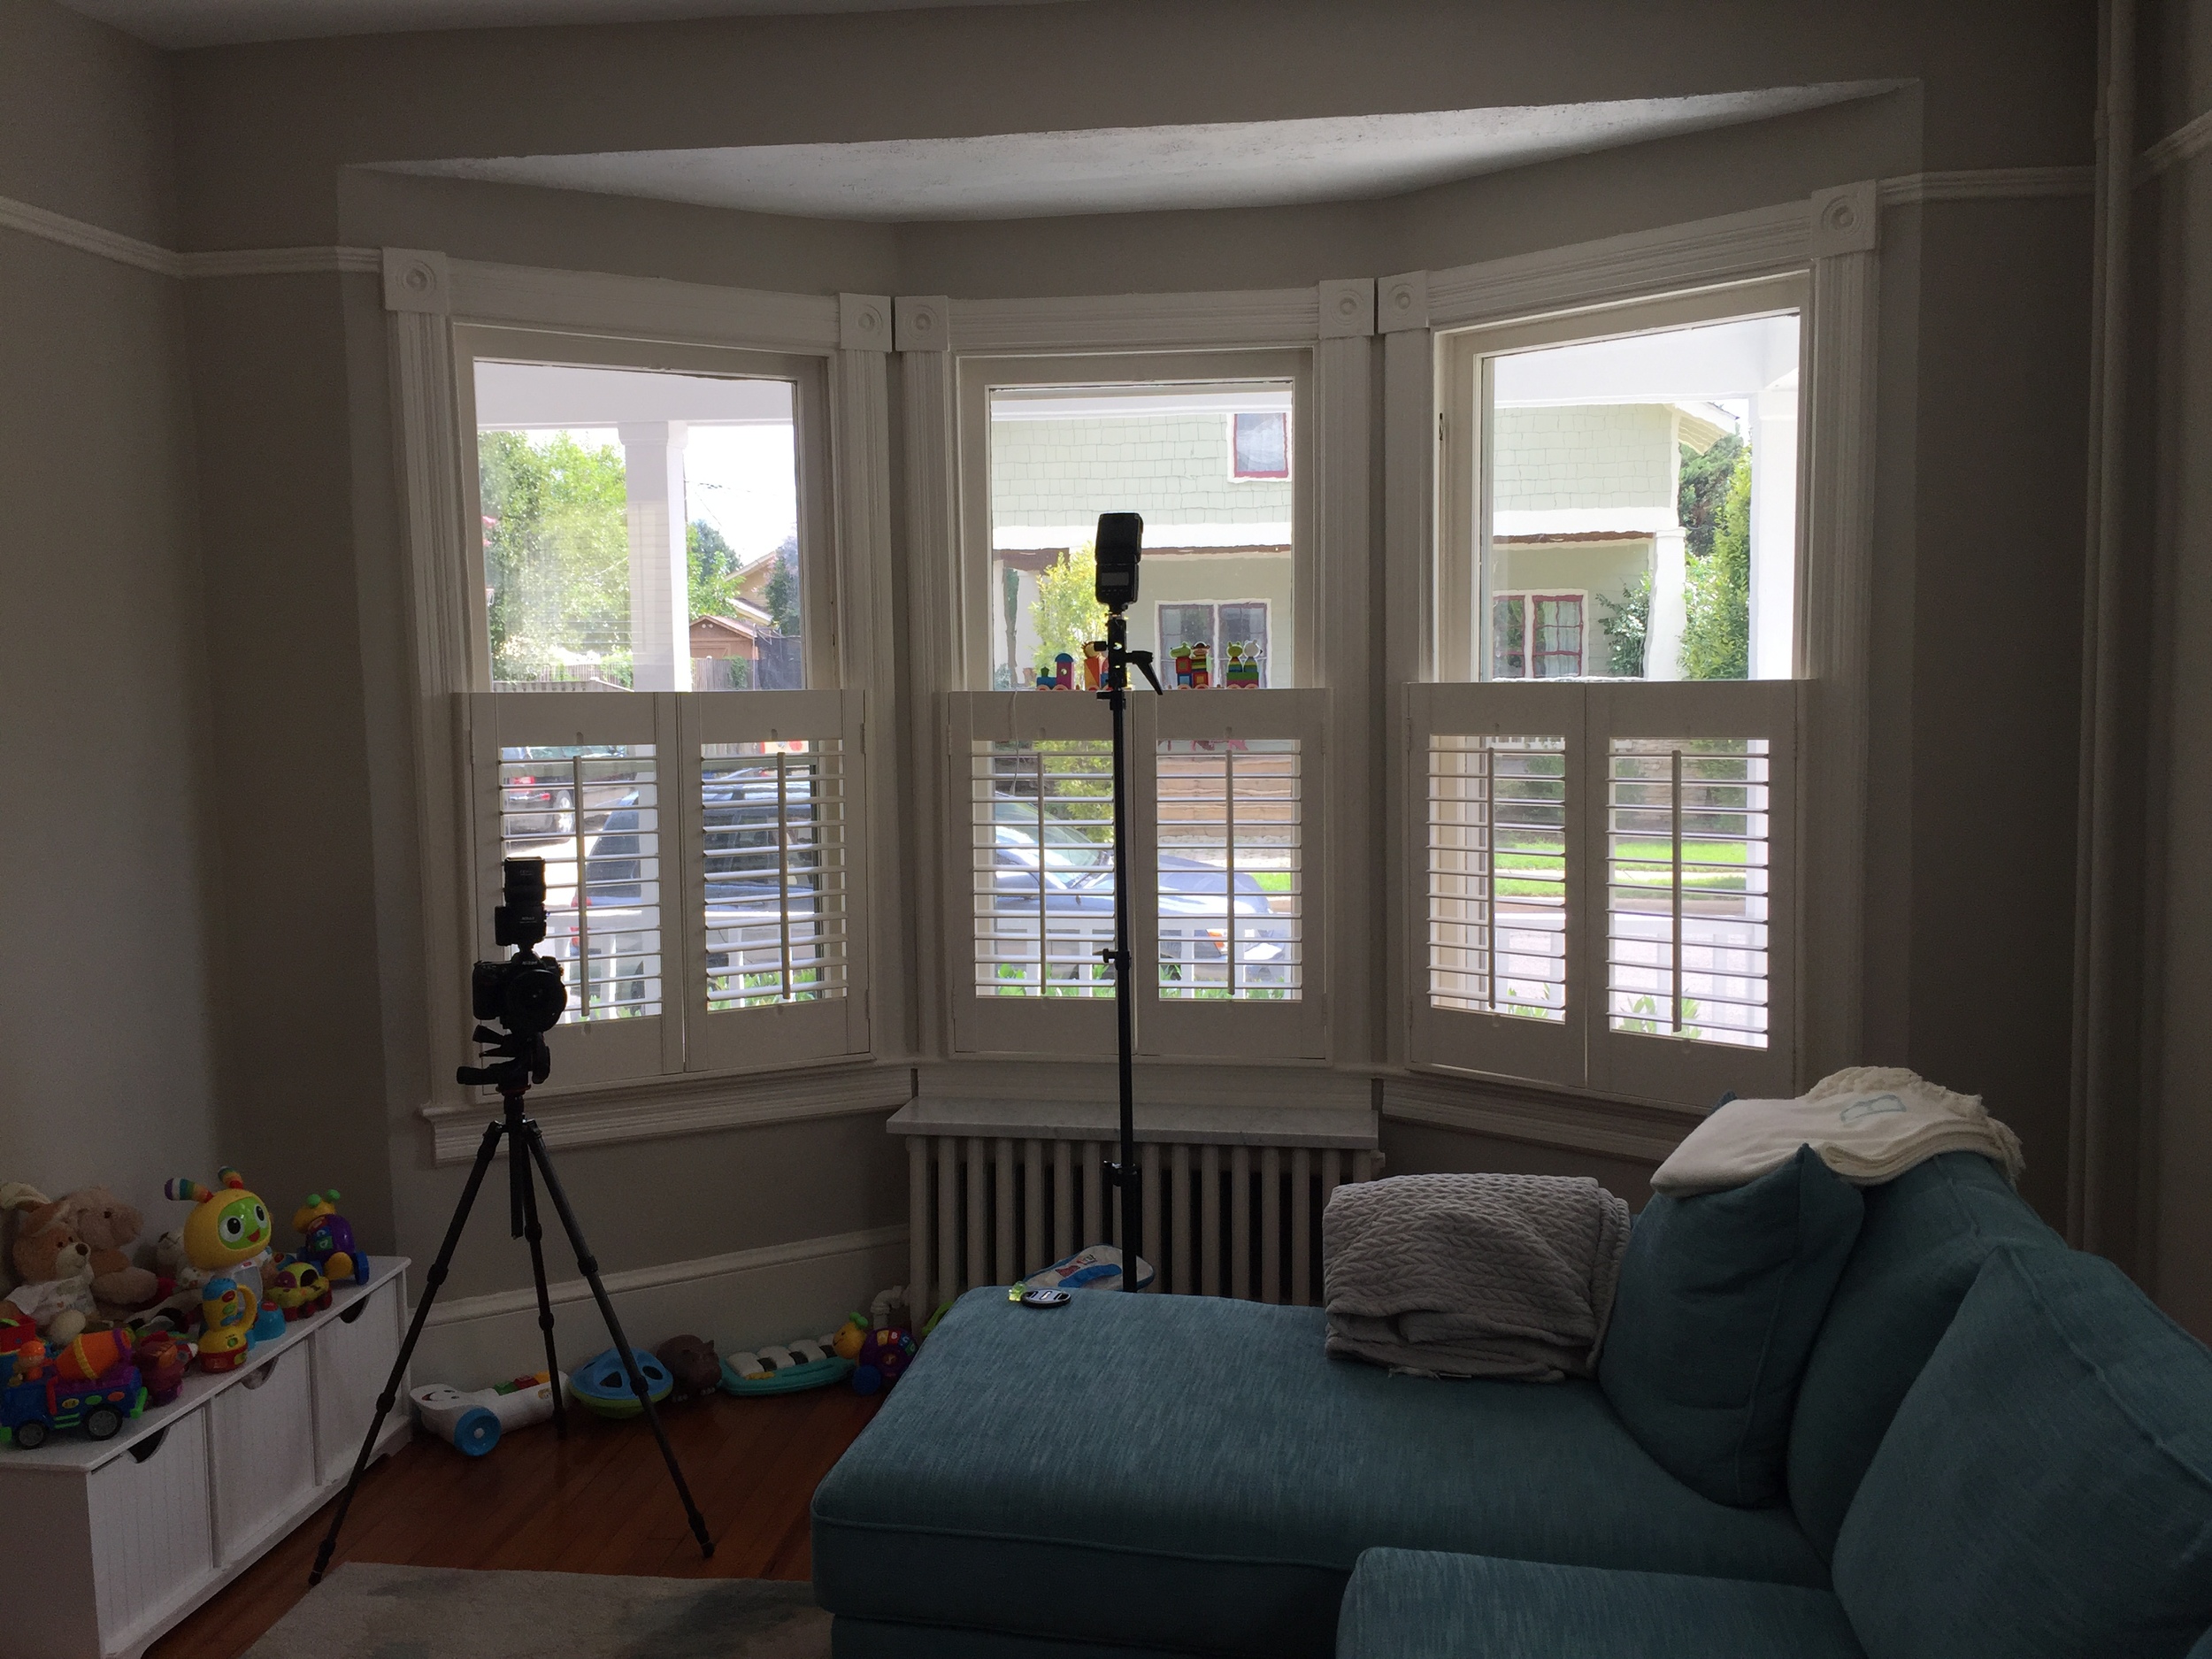
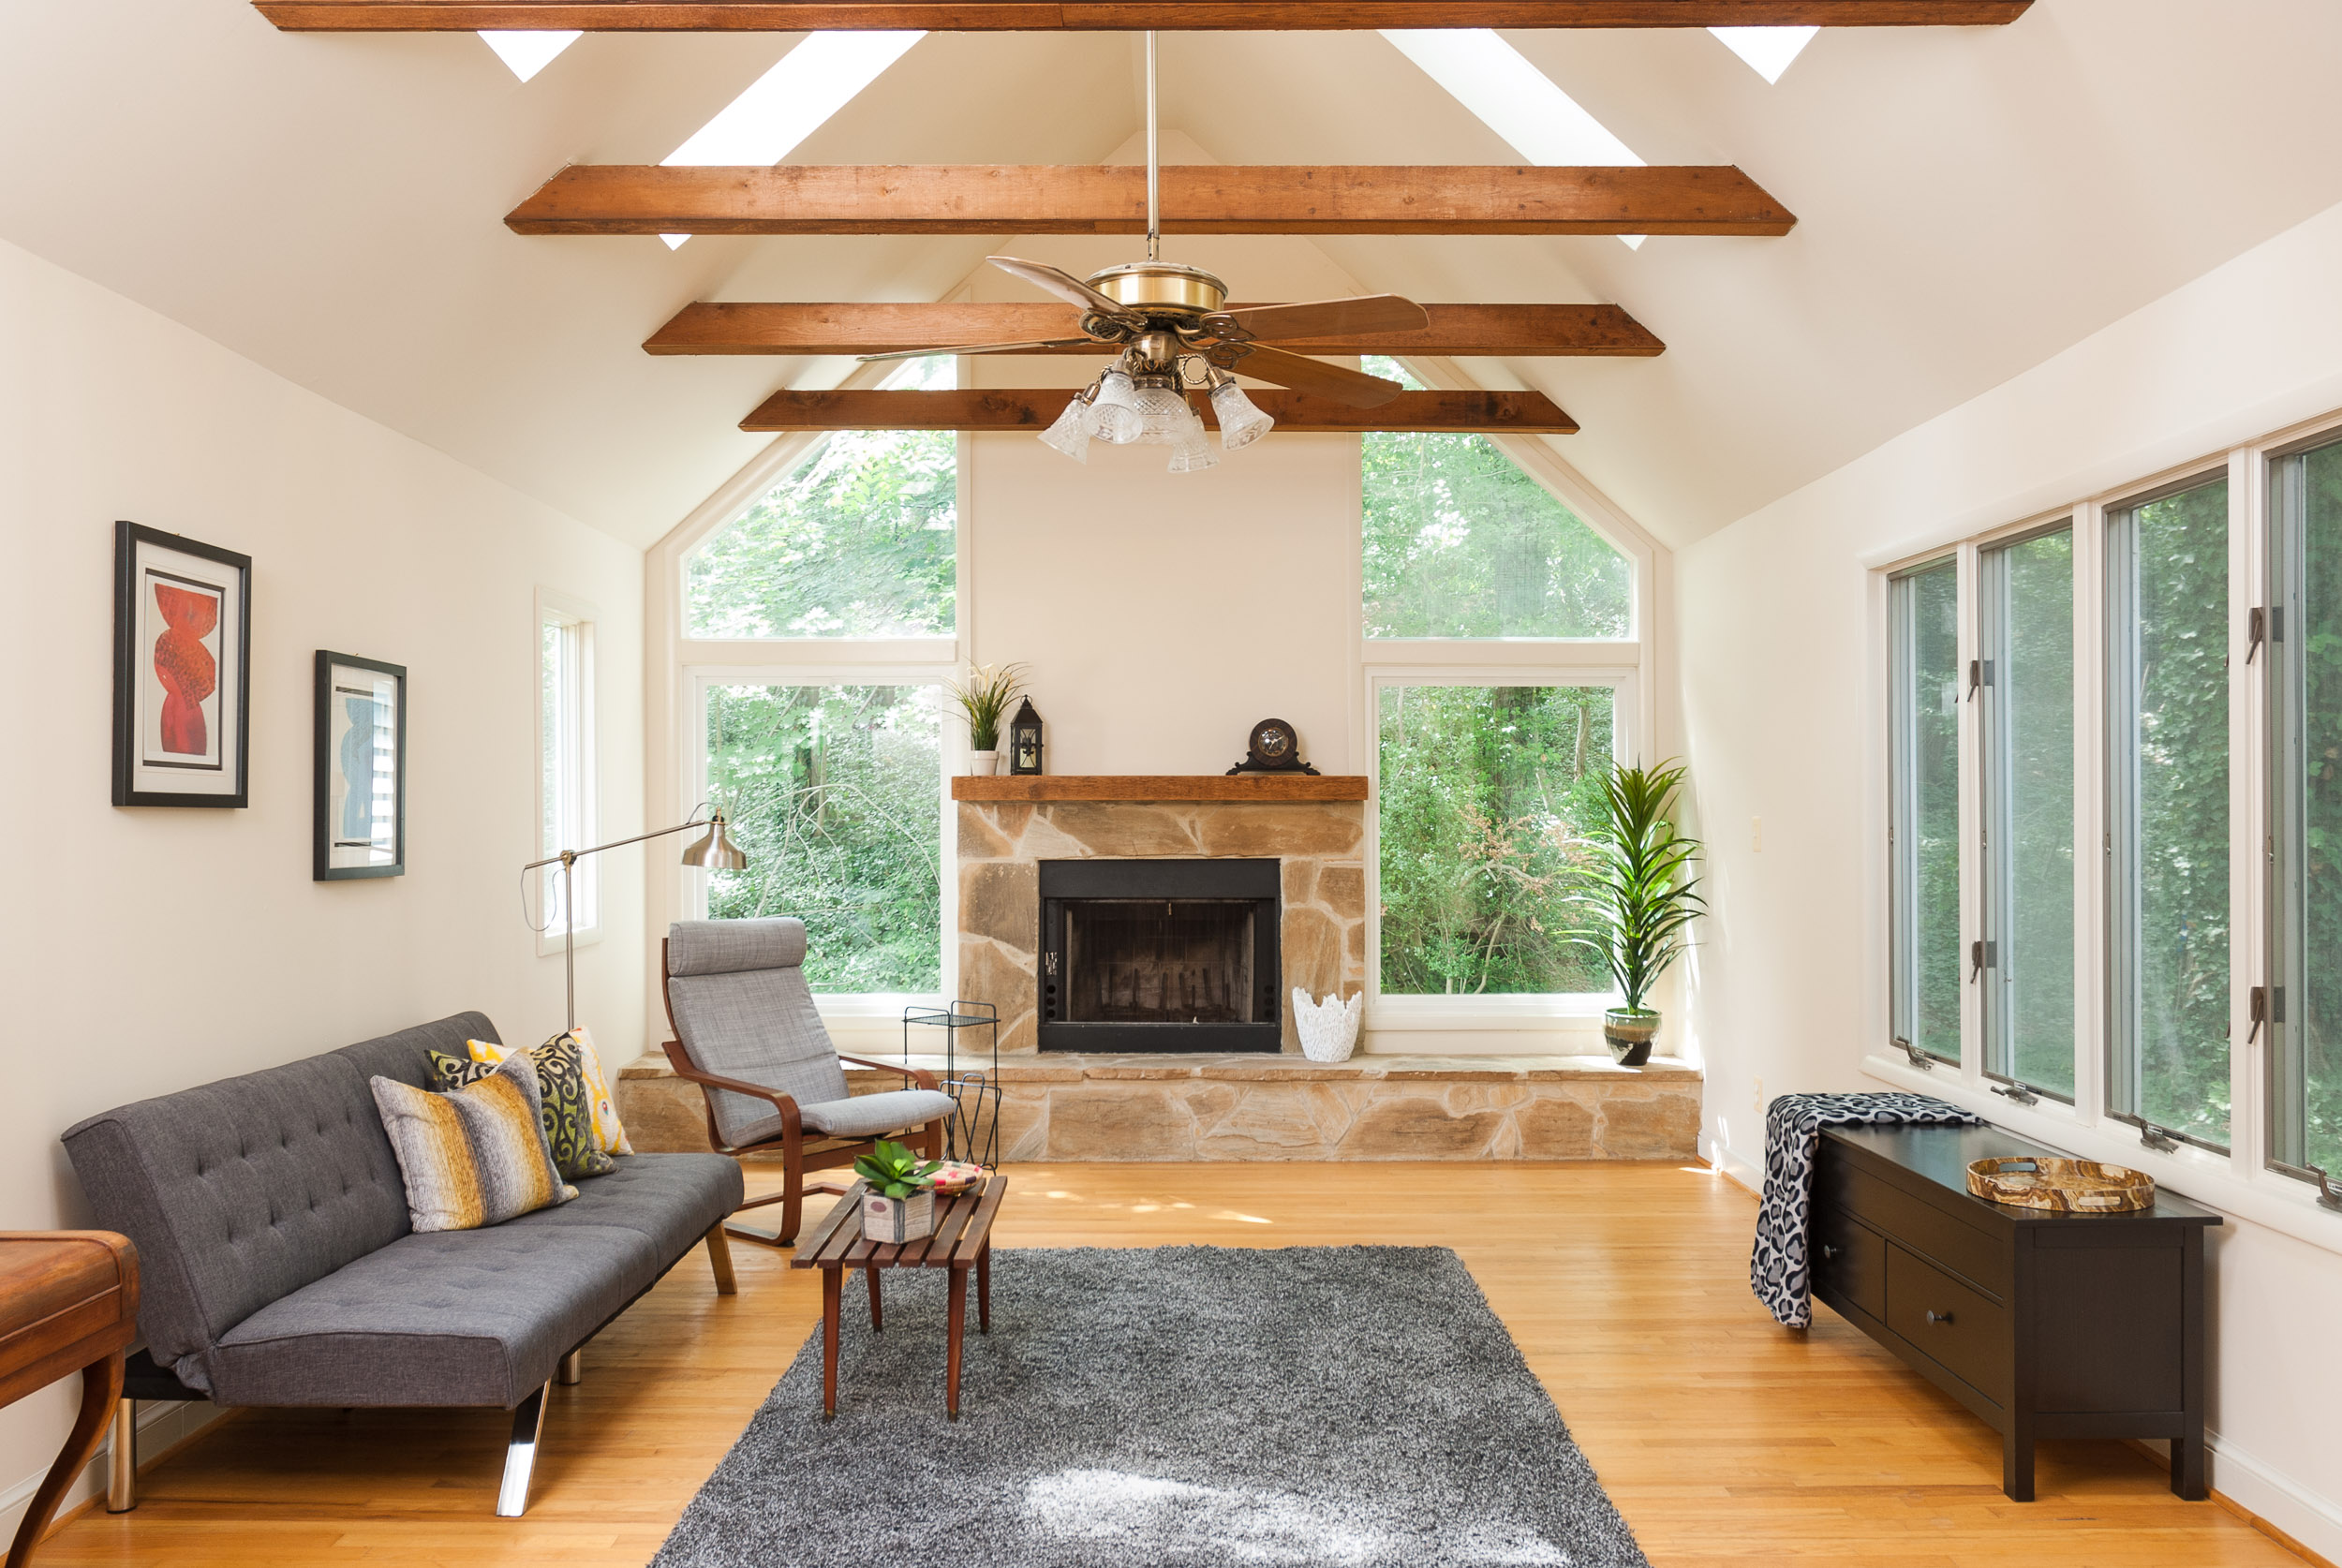
Take a look at the two living room photos above. One is the natural light shot, and the other is what it looked like once I added my lights to the scene. I used two large umbrellas outside, coming through the windows near the couch to camera right, which simply augmented the existing natural light. Then I scraped a gridded speedlight with a warming gel across the fireplace to bring out the definition in the fireplace and the stonework.

Nikon D200, Tokina 11-16mm f/2.8 Pro AT-X II @ 13mm, ISO 200, f/8, 1/13 sec.

Nikon D200, Tokina 11-16mm f/2.8 Pro AT-X II @ 13mm, ISO 200, f/8, 1/13 sec.

In addition to the interior shots and the normal exteriors, I also did a twilight exterior shoot. On a house like this, it would really be a crime not to do a twilight shoot. The beauty of these homes is in their floor-to-ceiling windows and the houses just glow beautifully when the sun goes down.

Nikon D200, Nikon 18-70mm f/3.5-4.5 AF-S DX @ 29mm, ISO 100, f/8, 1 sec.

Nikon D200, Nikon 18-70mm f/3.5-4.5 AF-S DX @ 29mm, ISO 100, f/8, 1 sec.

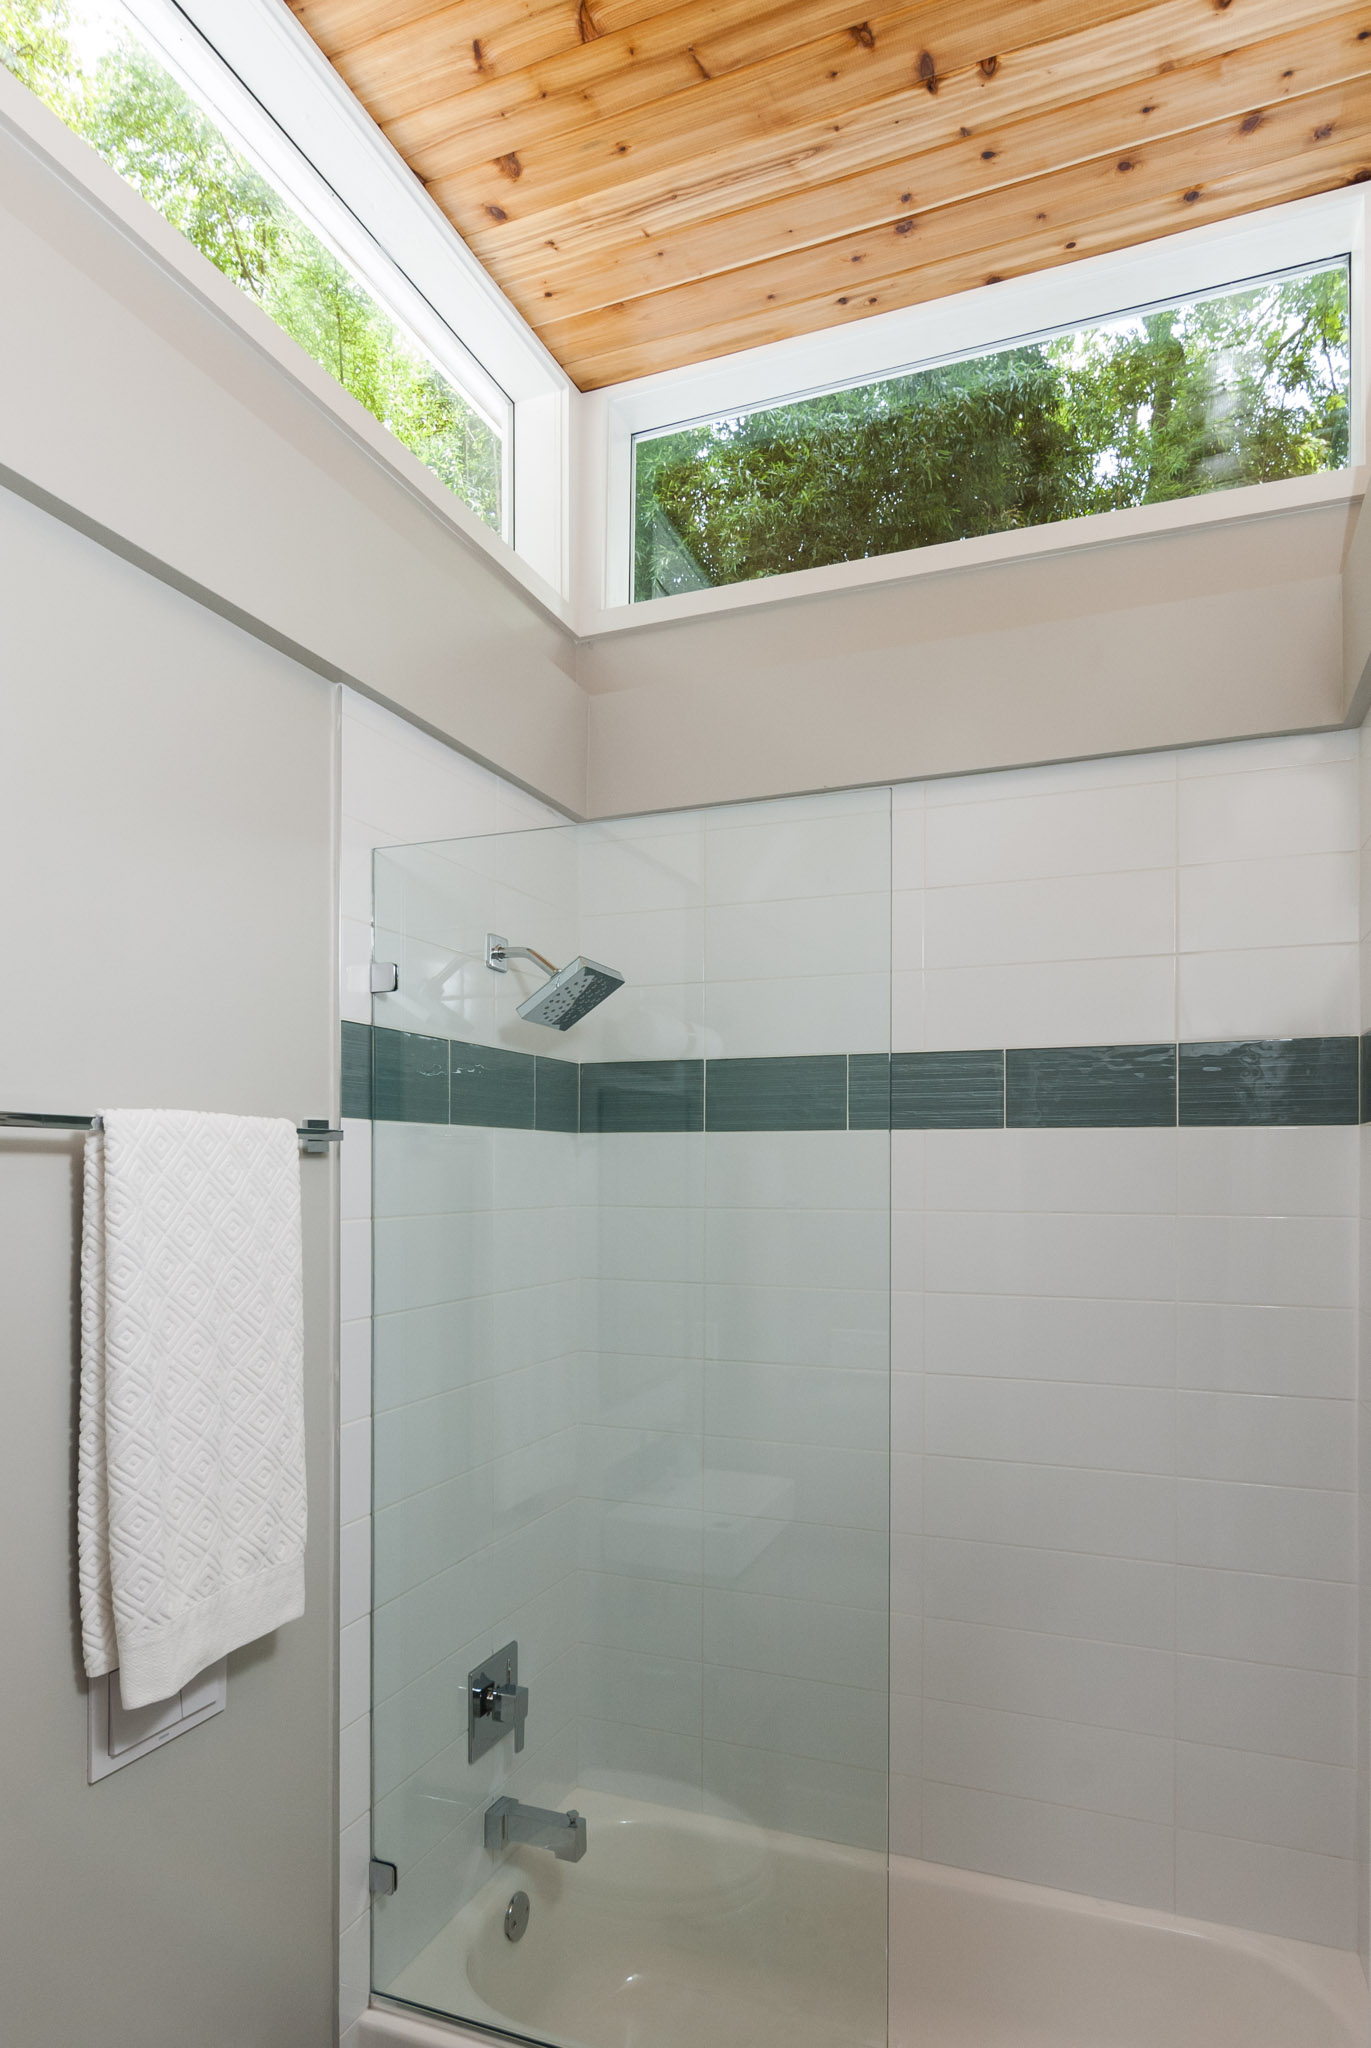
Twilight photos are fairly simple to make, but you have to be ready for the light when it is just right. That means a lot of running around to make sure that all of the interior and exterior lights are on, so that you can be ready during that 10-15 minute window when the natural light comes into balance with the home's light fixtures. The photo above was a crucial shot, because Teresa really wanted to show how the home's tower became illuminated at night. The two windows that you can see at the right (on either side of the chimney) are at the top of the hall bath (see below). Teresa's team put an LED strip up there in order to create a cool vibe at night, and it came through very nicely. The problem was the far left window which is above a hallway. Even with the hall light on, it wasn't bright enough to appear in the photo. In order to get that window to light up (as seen in the photo above), I put a speedlight in the hall with a warming gel. It was triggered via PocketWizard radio remotes (with their impressive 1600 ft. range).

Nikon D200, Tokina 11-16mm f/2.8 Pro AT-X II @ 13mm, ISO 400, f/8, 1/50 sec.

Nikon D200, Tokina 11-16mm f/2.8 Pro AT-X II @ 13mm, ISO 400, f/8, 1/50 sec.

Twilight photos can really transform a house. Check out the daylight exterior shot below from a similar angle. The house looks nice enough, but you're at the mercy of some harsh shadows and the windows look uninviting.

Nikon D200, Nikon 18-70mm f/3.5-4.5 AF-S DX @ 18mm, ISO 100, f/5.6, 1/60 sec.

Nikon D200, Nikon 18-70mm f/3.5-4.5 AF-S DX @ 18mm, ISO 100, f/5.6, 1/60 sec.

I hope you've enjoyed the photos of this house as much as I enjoyed shooting it. Be sure to keep an eye out for more house flips from Teresa in the future. Her work is stunning!

Arlington Duplex Flip by Jonathan Barnes

Nikon D200, Tokina 11-16mm @ 11mm (approx. 16mm full frame), ISO 400, f/8, 4/10 sec.

Nikon D200, Tokina 11-16mm @ 11mm (approx. 16mm full frame), ISO 400, f/8, 4/10 sec.

This is now the second house flip I've photographed for Teresa Bosch and company at Bosch Homes, LLC. They redesign, remodel, stage, and then sell the houses they work on. Teresa's work is excellent and I always find myself wanting different elements of the homes she works on in my own home. You can see what I mean in the photos.

As Teresa's end goal was to sell the home, I shot the photos with a real estate mindset. Wide, bright, and cheery. There were some definite challenges on this shoot, so I'd like to go into the process behind a couple of the photos I made for her.

At the top of this post is a version of the photo below that I made for my portfolio. You'll notice that the photo above is cropped tighter, has a little less color cast, and is missing the wires, ceiling fan pull cord, wall vents, and switch plates. You don't want stuff like that cluttering up your portfolio shots, but you can't do that sort of thing with a real estate photo, which is why I left it all in the shot below. It's also not cropped so as to make the space feel even bigger.

Classic real estate photography: wide, bright, and inviting. "Buy me."

Classic real estate photography: wide, bright, and inviting. "Buy me."

One of the major challenges I faced during this shoot was the available ambient light outside. We weren't able to shoot the house until 4 pm, and it was close to 5 by the time I got to this room. Add in the rainy conditions and the fact that the days are getting shorter, and you get a pretty poorly lit window exposure. It's usually a really easy thing to control because you can use shutter speed to control the window exposure, and then add flash to illuminate the interior.

I did that here, but it starts to become an issue when you want light fixtures turned on in the house. To bring up a dim window exposure, you then run the risk of severely blowing out your fixtures. In the photo above, you can see that I'm getting close to that danger zone, and although everything worked out, the fixtures were contributing to the exposure more than I wanted them to, hence the warm glow. I think the warmth is actually fairly inviting in this photo, but the color cast does bother me a bit. If I had all day to make this photo, I could have done all sorts of things to fix these issues, but in real estate photography sometimes you have to compromise.

Oh, and if you're wondering why I even bother using flash when I have the fixtures contributing ambient light, the unlit photo below should be enough proof!

The ambient-light exposure of the above photo.

The ambient-light exposure of the above photo.

I mentioned before that the bedroom photo was shot around 5 pm. Well, the final photos I took of the house were in the kitchen and I was pushing 6 pm by the time I got around to those. By that time, the ambient light outside had dropped considerably and things were looking downright dark.

Let's walk through the whole process of the kitchen photo from start to finish. Keep in mind that I want the light fixtures on, I want the window to look bright and cheery, and I want to light the rest of the room to improve the color, quality, and direction of the light. The first step is usually to expose for the window and let the light fixtures fall where they may. Well, with the ambient outside light as low as it was, it would have turned the light fixtures into nuclear orbs. So, I was forced to do the opposite and expose for the light fixtures, letting the window go dark. Even so, I had the light fixtures maybe a tad on the hot side.

Ambient light photo of the kitchen. Check out that window!

Ambient light photo of the kitchen. Check out that window!

Is that a window, or is it a black hole? Hard to tell! Okay, next I add some speedlights to bring up the kitchen the way I want to see it and we get the photo below.

The black hole is now reflecting one of my speedlights. Don't worry, we'll deal with that soon.

The black hole is now reflecting one of my speedlights. Don't worry, we'll deal with that soon.

Notice how the speedlights help to erase a lot of the color cast from the fixtures, but there's still a warm glow from them. They also bring up the exposure level of the room, as well as create some soft, flattering light. That's all great, but we still have a really weird vibe with that dark window. This is the time for some Photoshop magic. I had pretty much already decided to take a separate exposure with the light fixtures turned off. That way they wouldn't go nuclear and I'd have my bright, cheery window. Then all I needed to do was mask the window in using Photoshop. It's not the easiest thing in the world, but it's not that hard either. I wouldn't want to do it on all of the photos in a real estate shoot, but I had no choice here. I certainly wouldn't want to deliver the above photo to my client!

A window exposure with the light fixtures turned off.

A window exposure with the light fixtures turned off.

In order to get the window exposure above, my shutter speed was 8 seconds. 8 seconds!!! Ridiculous... what's wrong with me, right? But hey, you play the cards you're dealt. By contrast, the exposure for the fixtures was 1/10 of a second. If I'm doing my math correctly, that's a bit over six stops of light difference between the light fixtures and the outside ambient light. In this case, the difference is night and day. Oof. Sorry.

The final image, after using Photoshop to mask in the window from the previous exposure.

The final image, after using Photoshop to mask in the window from the previous exposure.

A nice side benefit from masking in the window was that I got rid of that pesky speedlight reflection. I could have moved the speedlight a bit to get it to go away, but once I knew that I'd be masking in the window, I didn't need to worry about it! The final product is a photo that no one (except you, dear reader) would expect was taken at 6 pm on a rainy, overcast fall day.

I'll share one more photo with you before I sign off, and this one was perhaps made more possible by the fact that it was so dark outside. During the walk-through, my client mentioned that she might like a shot like this, but not to worry about it if I didn't have time. The thing is, do you think I'm going to let a photo go by that my client said she might like? Nope! The photo, below.

The kind of kitchen detail that I love to grab if I can.

The kind of kitchen detail that I love to grab if I can.

This isn't your typical real estate photo, but as I mentioned in the last blog post, I think detail shots can really help to bring in potential buyers. Couldn't you imagine yourself in this kitchen, candles lit, pouring a glass of wine after a long day? Maybe sneaking a nice cheese out of that fridge?

Ambient light only. The third candle didn't like me, so I had to clone in the glow in Photoshop.

Ambient light only. The third candle didn't like me, so I had to clone in the glow in Photoshop.

Check out the ambient grab above. I made several test shots with only ambient light to see which exposure would make the candles look best. The rest of the ambient light in the photo is coming from the window that we discussed in the previous kitchen photo. It contributes very little, allowing me to then shape the light with my speedlights. If it had been bright outside, a lot more light would have been coming from that window. That's not necessarily a bad thing, but having a nearly blank slate upon which to create my own light was a nice change of pace.

A Closer Look by Jonathan Barnes

Nikon D200, Nikon 18-70mm @ 55mm, ISO 400, f/7.1, 1/30 sec

Nikon D200, Nikon 18-70mm @ 55mm, ISO 400, f/7.1, 1/30 sec

As a real estate photographer, your ultimate goal is to persuade a prospective buyer to get off the couch, leave the comfort of their home, and come take a first-person look at a property. But there's something deeper going on psychologically and you need to understand it.

My wife gets this, and I get it now, but I didn't always understand. It's like the time we were buying a new car. I wanted to play it cool at the dealer (even though our car was on its last legs and we needed a new one ASAP), and I was trying. I'm not that great at negotiations, but I was trying. In the showroom, there happened to be a lovely green version of the model of car we were looking at (we had test-driven a white version). My wife proceeded to tell the salesman that she loved the color of the showroom car.

Crap.

And that was it, right? Although she wasn't the biggest fan of the car itself (and we've since outgrown it), she loved the color. That was where her heart was and it wasn't really going to budge.

Nikon D200, Nikon 18-70mm, ISO 100, f/7.1, 1/10 sec

Nikon D200, Nikon 18-70mm, ISO 100, f/7.1, 1/10 sec

It's like that with prospective home buyers too. You need to get them to fall in love with the property that you're photographing. Whether they realize it or not, deep down they will begin to imagine themselves living in that space, cooking there, entertaining there, relaxing there. They will envision their kids growing up there and eventually grandkids will visit and enjoy the home. Or some version of the above.

Nikon D200, Nikon 18-70mm @ 62mm, ISO 160, f/4.5, 1/10 sec

Nikon D200, Nikon 18-70mm @ 62mm, ISO 160, f/4.5, 1/10 sec

So, as a photographer, how do you do this? Well, staging is key, and so is proper lighting, composition, color, and all of the other things professional photographers think about. But the detail shots can really sell it. Details are not going to be your bread and butter real estate shots, but including a few in every shoot can really pay off. Not only are you over-delivering to your client, but you are planting the seed in those buyers' minds.

Nikon D200, Nikon 18-70mm @ 25mm, ISO 400, f/7.1, 1/20 sec

Nikon D200, Nikon 18-70mm @ 25mm, ISO 400, f/7.1, 1/20 sec

They need that house. No one else can have that house, and they can't imagine living anywhere else.

The cute little breakfast nook with the warm sunlight streaming in the window.

The cozy couch with the fluffy pillows and warm blanket.

The vase of fresh-cut flowers in the entryway.

The bathroom vanity sporting the latest high-end fixtures.

The chef's kitchen.

Nikon D200, Nikon 18-70mm @ 60mm, ISO 400, f/7.1, 1/20 sec

Nikon D200, Nikon 18-70mm @ 60mm, ISO 400, f/7.1, 1/20 sec

The reality is that, of course they can live in another house, but it's marketing, right? We don't need that luxury Jaguar, we don't need that bucket of chicken from Popeyes, we don't need a gecko-driven insurance policy.

Your photos are going to create the first impression for most prospective buyers. It's your photos that will get them in the door. Give them that little extra nudge with some subtle detail-oriented marketing.

Lighting Adjoining Spaces by Jonathan Barnes

Don't forget to make your adjoining spaces look as good as the primary space.

Don't forget to make your adjoining spaces look as good as the primary space.

There's so much to remember when you're trying to make a great real estate photograph. Doing some light staging, deciding on the composition, leveling and focusing the camera, creating the light, and checking all of the details. And, usually, you're under the gun time-wise.

You can see how it would be easy to forget something. Oh yeah. That other room you can see in the shot. Oops. I forgot to [stage it/light it/move my bag of gear].

Today, we'll just focus on the lighting because it's probably the most obvious thing. An un-staged adjoining room is not ideal, but it's not the end of the world either. Things are usually farther off in the distance and it can be hard to see those little mistakes at a typical viewing size. It's another story if your client is planning on making big prints or you're shooting for a magazine!

The photo directly below demonstrates what happens when you don't light the adjoining space. Compare it to the photo at the top of this post, and you can see the drastic difference. You definitely don't want an adjoining room to look like a cavernous abyss. That's not inviting at all!

An unlit adjoining room can quickly give a real estate photo that spooky vibe.

An unlit adjoining room can quickly give a real estate photo that spooky vibe.

Let's break down the lighting step by step so that you can understand what's going on. I even remembered to take behind-the-scenes photos with my iPhone!

Step 1: Find a good window exposure. Always subjective, but I opted to show less of my neighbor's house by blowing out the windows a bit more than usual.

Main light, bounced into the wall/ceiling joint.

Main light, bounced into the wall/ceiling joint.

Step 2: Bring up the main room with your first light. In this case, a speedlight placed back camera left, bounced off the wall/ceiling junction above the bay windows.

Main light for adjoining room.

Main light for adjoining room.

Step 3: Bring up the adjoining room in similar fashion. This was done with another speedlight firing at the junction of two walls out of sight behind the pocket door. Note: pocket doors are awesome, so if you're shooting a room that has them, show them off a bit. Also, the door helped hide my speedlight and lightstand, although I did have a bit of room to play with over there.

Kicker light on a high-end highchair lightstand.

Kicker light on a high-end highchair lightstand.

You could pretty much be done there, but I decided to add a third light in the dining room as a kicker. It helped to bring out a little definition in the chairs and kept things from getting too muddy in the table/chairs area.

All of the speedlights were trigged via their built-in optical slaves by another speedlight placed on-camera and aimed at the ceiling. The on-camera speedlight was powered down to 1/128th power so as to not affect the exposure. The nice thing about this is that you can bring up that power level if you decide you need a little fill light. Things were looking pretty good to me, so I opted to keep the power level down and use it only to trigger the other lights.

Even if you're not using lights and such, always remember to pay attention to the adjoining spaces. It can make a big difference in your final images!

To Light Or Not To Light by Jonathan Barnes

One of my trusty old Nikon SB-26 speedlights.

One of my trusty old Nikon SB-26 speedlights.

That is the question. I'd wager that the vast majority of home sellers, buyers, and real estate agents have no idea that a secret war is being waged by real estate photographers on internet forums around the world.

Yes, war. And oh, what a nerdy war it is. The argument over whether to use natural light (including daylight and fixtures), artificial light (speedlights, hot lights, strobes), or HDR (High Dynamic Range).

Without getting too deep into this discussion (do a web search and you'll find plenty if you're interested), I thought we'd do a quick comparison of the techniques in our lab. Before we get started, I will say that my preference is to augment the existing light with speedlights. Yes, I am a lighting nerd, but it goes deeper than that and we'll get into it. Especially with real estate shots, I like to use my lighting to mimic the existing natural light in the scene, if conditions allow. This way, the light can appear as natural as possible, but with the control that natural light doesn't always provide. We'll of course be using our handy-dandy living room lab to help us observe these different approaches.

First off, a natural light approach. Arguably the easiest (and possibly most frustrating) way to do things is to let the light come to you. Natural light at its best is the best, hands-down, but you don't always get to pick it. And when you have to do a real estate shoot, you don't always get the time of day that you want. Plus, what about the weather? Clouds, rain, direct sun, off-color light being bounced in a window off a neighbor's puce-colored house? Yes, puce, not puke.

You don't get any control with natural light, so you're at the mercy of the time of day and the elements. Good luck!

Natural light can be beautiful, but incredibly frustrating.

Natural light can be beautiful, but incredibly frustrating.

The light in the photo above isn't bad at all. I was lucky to have no direct sunlight streaming in, so it creates a soft overall feeling inside the room. When shooting interiors with natural light, you'd better have one of two things: Lots of windows, or some pretty well-designed/positioned light fixtures. In this case, the windows provide plenty of light, and a decent quality of light at that. The problem is that you can't really control your window exposure, so you will almost never be able to see the scene outside (not that you always want that, but it's nice to have the option). The workaround is to shoot closer to dawn or dusk, neither of which are always convenient (if an option at all).

With a little bit of post-processing, we're able to pull off a pretty decent real estate shot. In the photo above, I pulled up the shadows, toned down the whites and highlights, and so you can have a natural light photo with decent dynamic range (and my camera is 10 years old!).

Next up, HDR, which is short for High Dynamic Range. The oft-abused, yet overly popular stepchild of the photography world, HDR has become incredibly popular with run-and-gun real estate photographers. And you can understand why:

It's quick (not much longer than taking a natural light shot). It's easy (software does the blending for you). It lets you compress those highlights and shadows so that a viewer can see all of the details.

The problem is that it gets abused. Do a quick Google search of HDR photography and you'll see what I mean. Garish colors, angelic haloes around objects, flat lighting. Weird, but oddly attractive to many people.

There is a process called hand-blending where a photographer goes through the HDR process by layering multiple images in Photoshop, and then selectively revealing the different exposures to create a well-crafted final image. It can take an hour or more to hand-blend one photo.

On the other hand, the majority of HDR in real estate photography is done by loading the multiple exposures into software and letting the software decide which parts of each photo to blend together. The results are not always very pretty, and control is not its strong suit.

An HDR image created in Lightroom from seven different exposures.

An HDR image created in Lightroom from seven different exposures.

My HDR experiment went surprisingly well, actually. I took a 7-exposure bracket (one exposed "properly" and then three shots underexposed and three shots overexposed). Then, I selected them all in Lightroom and let the software do its magic. Lightroom exercised impressive control and created a not-all-that-garish photo; however, I had little control over the process.

My preferred method, lighting with flash, is all about control and that's why I love it. You're essentially creating two exposures in one, because the ambient portion of the exposure and the flash lit portion of the exposure are affected separately by the shutter speed. Therefore, you can have your windows and fixtures exposed where you want them, and then light the room with flash to create a well-balanced photo.

A single exposure lit with multiple off-camera flashes.

A single exposure lit with multiple off-camera flashes.

Just like HDR, it can be easy to abuse flash, so I have a few rules that I tend to follow when using flash for real estate photography. The first rule is that it has to look as much like natural light as possible. When I'm shooting creative portraits or even interior design, I can get much more creative with the light, but real estate photography has to look like the real thing. Prospective home buyers don't want to walk into a space and have it look nothing like it did in the photos!

I always try to have my flash come from the same direction as the natural light. In an ideal world, that means throwing some umbrellas outside of the windows to augment the natural daylight. Practically, I don't always have time for that, so it means bouncing a flash off of an area near the windows (but still out of sight of the camera). In the example above, my main flash was being bounced from the upper right corner of the photo (just out of view). It's not perfect, but it's close to that window in the photo and so the direction of the light seems logical. A second flash is being used as a very subtle kicker coming in from the hallway off to the left of the toy box. This mimics light that could be bouncing in from that hall (which has a couple of windows). My third flash is on the camera, being bounced into the ceiling. It's not really contributing to the exposure; rather, its role is to fire the other flashes through their optical slaves.

Sound complicated and expensive? Not really. It does have a bit of a learning curve, but it's easy to start with an on camera flash bounced into the ceiling and see where that takes you. As far as cost, it's easy to find old, used speedlights. My Nikon SB-26's with the optical slaves usually cost between 70 to 100 bucks. Cheap, as far as camera gear goes!

Home Photoshoot for Impact Staging by Jonathan Barnes

Nikon D200, 18-70 mm 3.5-4.5 AF-S DX @ 18 mm, ISO 100, f/7.1, 1/5 sec.

Nikon D200, 18-70 mm 3.5-4.5 AF-S DX @ 18 mm, ISO 100, f/7.1, 1/5 sec.

Lest any of you think that I only shoot photos of my own living room, here's a peek behind the scenes at a recent photoshoot I did for MaryAnn Perkel, owner of Impact Staging & Organization here in Northern Virginia. She does an amazing job, and, for me as photographer, it's a pleasure to be able to focus on the composition and lighting without having to worry about the staging.

The photo at the top of this post was one of my favorites (exposed beams=awesome) and so I thought I'd do a quick walkthrough of how I created this image.

The first thing I always do (after staging, but, you know, she killed it) is to find my composition. Having already done a walkthrough of the house to determine which shots we'd be making, I already knew that I wanted to shoot this room straight-on. The symmetry of the windows around the fireplace, as well as the exposed wood beams kind of demanded that I compose the shot in this way. Then I'll usually handhold the camera to find a more exact composition. I'll move up and down, side to side, and play with various focal lengths. Next, I lock the camera down on my tripod and use a geared head to level it and fine-tune the composition.

The second thing to do is to find the ambient exposure. This usually comprises the windows and any light fixtures that I want to be illuminated. I had tried shots with both the ceiling fan lights on and off and decided during post-processing that the lights were a bit too distracting with all of the beautiful natural light coming through the windows. It's good to shoot both ways so that you have the options to choose from later.

My window exposure ended up being 1/5 sec at ISO 100 & f/7.1. Why ISO 100? Sigh. I don't know. I usually shoot closer to 400 so that my speedlights can hang in there, but I was thinking about trying to get the cleanest file possible since this was not a real estate shoot. I don't know if MaryAnn will ever want large prints of these, but in case she does, she'll have really clean files to use.

The ambient exposure, before adding flash.

The ambient exposure, before adding flash.

The photo above shows the ambient exposure, and you can see my light stands on the left. They were there from a previous shot where this room was in the background, so they were hidden from view. It was as easy as repositioning them just a bit closer to the camera so that they fell out of view of the left side of the frame. There are two speedlights there, as well as a third resting on a piece of furniture near the other two. They're all aimed at a similar spot near the wall/ceiling joint in order to provide me with more power. Remember, I'm shooting at ISO 100 and these little speedlights don't have the power on their own to fill a huge room like this.

That being said, the ambient window exposure is providing me with a good amount of fill light in the room on which to add some flash. If it was pitch black in there after finding my window exposure, I would have been worried. As it was, I had a pretty good starting point, but adding the flash does two things. The most obvious is to bring up the exposure level of the room so that it appears bright and cheery, while the more subtle effect is that it adds depth and shape.

The exposure after flash has been added, with no retouching.

The exposure after flash has been added, with no retouching.

So the photo above shows the final shot, straight out of camera with zero adjustments. If you look in windows on either side of the fireplace, you will see the reflections from my flashes. They show up as large white blotches, most noticeable on the left-hand window. The reason they are not small reflections is because I am bouncing the speedlights off of the wall/ceiling, thereby increasing the size of the light source. It's great for creating soft light, but not so great when you have a lot of windows. Luckily, I had anticipated this and knew that I could easily clone those reflections out during post. If there had been something more complex outside, it would have been a harder task, but the trees all just meld together beautifully.

Because the photo was not going to be used for real estate, I had no problem cloning out the two outlet plates just above the fireplace. That's a big no-no for a real estate shot. Other post-processing included lens corrections, white balance, slight shadow-lifting, a touch of clarity, a slight S-curve to boost midrange contrast, and a tiny bit of sharpening. I apply a light touch with most of the post-processing. If you think you went a little too far, you went too far. Pull it back! Click the gallery below to see the photo before & after post-processing.

Another thing I like to do when shooting for a home stager or interior designer is to grab a closer shot, or detail. It's easy to do once you've got the lighting and exposure down, as long as the lights aren't in your new shot.

Grab a closer shot with the same light setup as the wide shot.

Grab a closer shot with the same light setup as the wide shot.

For the above shot, I moved the lights a little from where they were in the previous wider photo. Check out the setup shot below:

The setup shot. Speedlights are two LumoPro LP180s and a Nikon SB-26.

The setup shot. Speedlights are two LumoPro LP180s and a Nikon SB-26.

For the wide shot, the lights had been aimed at the wall-ceiling junction near the top left of that window above the piano. In order to trigger the lights, notice the radio receivers on top of the camera and attached to the lefthand light. The other two lights are trigged via their built-in optical slaves. That's quite the handy feature when using multiple lights on jobs like these!

I hope you've enjoyed this peek behind the scenes, and feel free to ask any questions in the comments.

My Camera is Better Than Yours by Jonathan Barnes

Oh boy. If I have to hear one more time...

"My cellphone camera is amazing. It takes better photos than..."

"My cousin has a really nice camera, so I just got him to take the photos of..."

"I just bought this 36-megapixel camera, so I'll be able to take my own photos of..."

If there's one cliche that applies to all of the above statements, it's the old adage, "It's not the tools; it's the carpenter."

These days, everyone is a photographer, or so it seems. Instagram, Facebook, Snapchat. Millions, billions of pictures. Every new phone has a great camera, and everyone and their uncle has a DSLR or mirrorless camera. But it's not about the tools. Let's put it in action, shall we?

Enter our mystery guest "photographer" (the party in question shall remain nameless as to protect their guil—innocence?). I asked this mystery photographer to take a photo our living room laboratory. The mystery shooter used my equipment, without my supervision, other than to provide a quick demonstration of how to focus and zoom. I also set the camera to program mode (read: auto). This exposure mode emulates the same kind of autoexposure mode that you'd find on most consumer cameras as well as cellphone cameras. The only parameter I provided was, "Pretend you are trying to make this room look its best for a real estate listing." The shot, below.

A real estate photo. You see ones just like this all over the interwebs.

A real estate photo. You see ones just like this all over the interwebs.

Composition is a little wonky. Lines are little crooked, but not terrible. Vertical lines are a bit haywire. The camera actually got the exposure pretty close, but there's no additional light being added to the scene, so it's too dark inside. Compare to one of my photos of the same room:

Decent composition, straight lines all around, well-lit windows and room, clean and polished look.

Decent composition, straight lines all around, well-lit windows and room, clean and polished look.

"Well, Mr. It's-Not-The-Tools-It's-The-Photographer, why don't you just shoot with a cellphone camera?"

Good point. Because of control. It honestly doesn't matter what kind of camera I choose to use, as long as I can control the settings. I need to be able to control the ISO, aperture, and shutter speed. I would like to be able to fire a flash. What don't I need? Megapixels, bells and whistles, the shiniest, newest thing. So, please don't tell me about your 50 megapixel cellphone camera with advanced facial recognition.

I hesitate to post this next part, but I think it fairly well underscores my point. Go ahead and google my camera body. Look up when it was first released, how many megapixels it has, and how much you can buy one for (used) these days.

Done? Yup, that's the camera I use for everything. Am I shooting billboards with it? Nope. Do I plan on upgrading in the future? You bet. But the point is that I can make beautiful images with that camera. I have studied and practiced technique, lighting, and composition. I have studied hundreds (if not thousands) of great photos. I'm not trying to toot my own horn, but it takes a photographer to make an image, not a camera.

Quick & Easy Staging by Jonathan Barnes

An unstaged living room. Try not to trip on any toys.

An unstaged living room. Try not to trip on any toys.

The Food Network's Iron Chef may have "Kitchen Stadium", but here at Jon Barnes Photo we have "Living Room Laboratory." It's actually not as exciting as it sounds, but hey, I tried. Sorta.

Anyway, for our first interior photography experiment let's try some easy staging. Goodness knows what sort of mess you might find when going into someone's home to take real estate photographs. I've been pretty lucky so far, but almost every home you photograph is going to need some help (unless you are fortunate enough to be shooting a professionally staged home).

Enter my living room. It's actually not in horrible shape, but it does need a bit of attention. There are the obvious things, like the toys on the floor, the couch throws, and the droopy pillows.

But then there are the subtler things: The louvers of the plantation shutters are in various disarray, and the ceiling fixture is crooked (right now my wife is wondering why it took a blog post for me to get around to fixing that).

A little cleanup goes a long way.

A little cleanup goes a long way.

It takes 2 or 3 minutes to straighten up small things like these, but it makes a big difference in the final photo. Now, we're not taking the room to a level worthy of a professional home stager or interior designer; however, we don't want to spend a long time on it. Remember, on a real estate shoot, we have a whole house to photograph in a short amount of time!

Usually, real estate agents will let the homeowner know to clean things up, and that certainly makes things easy. Regardless, it's not a bad idea to check with them beforehand, but there's bound to be a little work you'll have to do on your own. Take a few minutes and make it right.

The Great Wide-Angle Lens Debate by Jonathan Barnes

My wide-angle lens: the Tokina 11-16mm f/2.8 Pro DX II. 35mm equivalent: 16.5-24mm.

My wide-angle lens: the Tokina 11-16mm f/2.8 Pro DX II. 35mm equivalent: 16.5-24mm.

Wide-angle lenses are to real estate photography as baseball bats are to baseball. You can't really play the game without them. But how wide do you need to go?

I shudder and die a little bit inside whenever I hear someone refer to the need for a fisheye lens for real estate photography. Usually these people are not photographers (thankfully) and have no idea what a fisheye lens actually does (Google fisheye lens if you don't know). Rather, they are confusing the term fisheye with wide-angle. While a fisheye lens is a wide-angle lens, extreme distortion is one of its defining characteristics, and that is definitely not something you want to see in real estate photography.

Real estate photographers actually use rectilinear wide-angle lenses. Good rectilinear lenses keep straight lines straight, and even the slight distortion they produce can be easily corrected with post-processing software.

The problem with the majority of real estate photographs is not that they are being shot with fisheye lenses. It's that they are being photographed too wide.

Now, is this the fault of the photographer or the real estate agent?

A lot of the time, it's both. Many in the industry think that wider is better. Show everything that you can possibly show in the space and make it look bigger than it is. It's probably the latter that is the culprit most of the time, and I get it. Many buyers are looking for a spacious place to call home and a lot of the time, you don't actually have a spacious home that you are trying to sell. So, ultra wide-angle photographs create the illusion of a larger space, and you can at least get potential buyers in the door.

There are at least three problems with this, both for the agent and for the compositionally-conscious photographer. The first problem is that you may get your potential buyer in the door but once they see that the space looks nothing like the photo, they may be done. I know I've certainly felt that way in the past.

The second problem is for the photographer trying to create great work. Showing every single inch of the room is not only unnecessary, but it leads to a stagnant composition.

The third problem is more subtle, but something that you'll notice right away in the comparison photos below. The first photo was shot at at 35mm equivalent of 21mm (14mm on my DX sensor camera), while the second photo was shot at the equivalent of 27mm (18mm on DX). Look at the couch and closest window. In the first shot, the couch almost looks like it's falling out of the picture, while the window appears wider than it should.

Now, that isn't lens distortion that you're seeing. That is perspective distortion. The wider the lens, the closer you have to be to your subject to show what you need to show. What happens when you move closer is that objects closer to you appear much closer in comparison to objects further away from you. When you go really wide, that relationship becomes distorted in appearance, leading to the phenomenon you see when flipping between the two photos.

You may have noticed that my 21mm shot above didn't appear distorted until compared to the 27mm shot. But go wider and you'll start to really notice this effect. That's why I try to use the longest focal length I can get away with. I'm still shooting wide-angle, but I'm not just parking myself as close as possible and zooming my lens all the way out (the Tokina can go to 11mm, which is the 35mm equivalent of 16.5mm).

So, what's the solution? You're a photographer trying to get work in this industry, but the agents you work with want wide, wide, wide. Compromise. Look, 24mm is pretty wide. 20mm is quite wide. 16mm? Super wide, but why? It's too much most of the time and lends to distortion. Most of the really great interior photographers out there are shooting the majority of their work between 20mm and 24mm. Interior design photos are often shot with even longer focal lengths, although that comparison is unfair because that's a different industry.

I'm not saying there isn't a time to go ultra wide. There is, but it's not the bread and butter real estate shots. Ease off the wide zoom. Create tighter, more polished compositions. Show what needs to be shown, but make the space look appropriate and inviting. People will come.