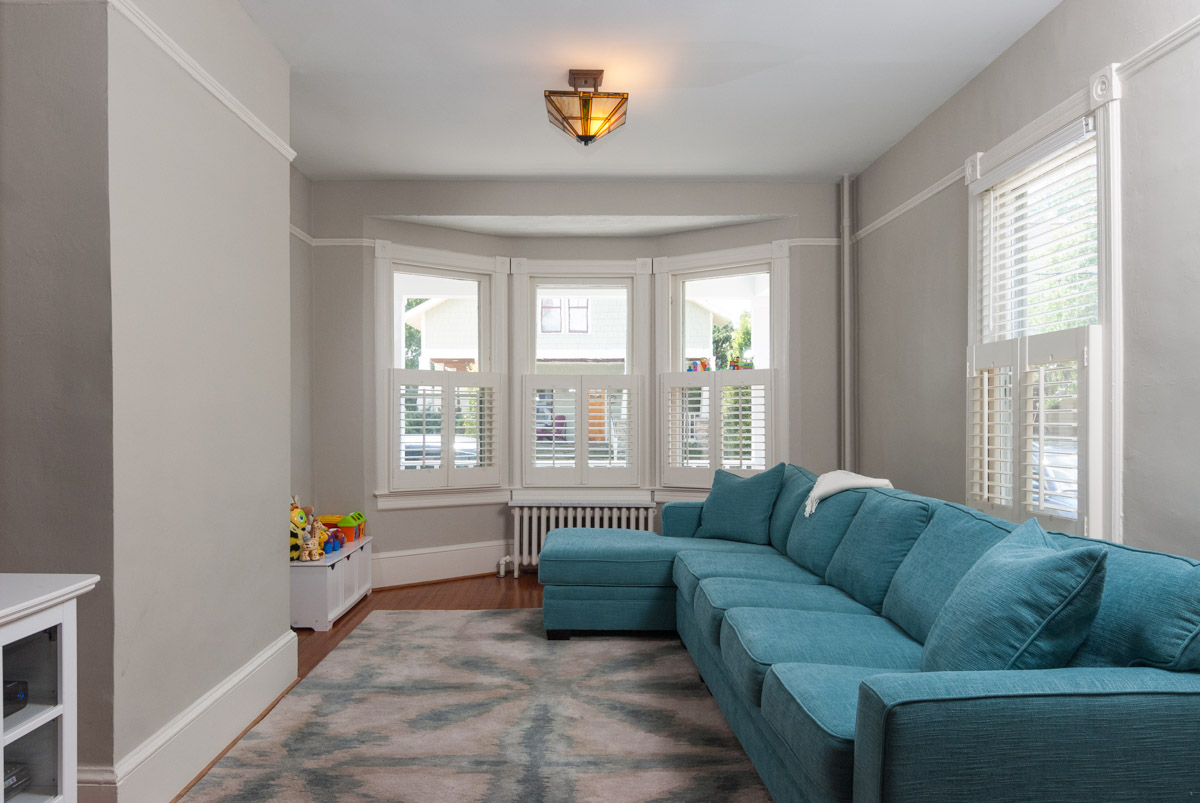
Don't forget to make your adjoining spaces look as good as the primary space.
There's so much to remember when you're trying to make a great real estate photograph. Doing some light staging, deciding on the composition, leveling and focusing the camera, creating the light, and checking all of the details. And, usually, you're under the gun time-wise.
You can see how it would be easy to forget something. Oh yeah. That other room you can see in the shot. Oops. I forgot to [stage it/light it/move my bag of gear].
Today, we'll just focus on the lighting because it's probably the most obvious thing. An un-staged adjoining room is not ideal, but it's not the end of the world either. Things are usually farther off in the distance and it can be hard to see those little mistakes at a typical viewing size. It's another story if your client is planning on making big prints or you're shooting for a magazine!
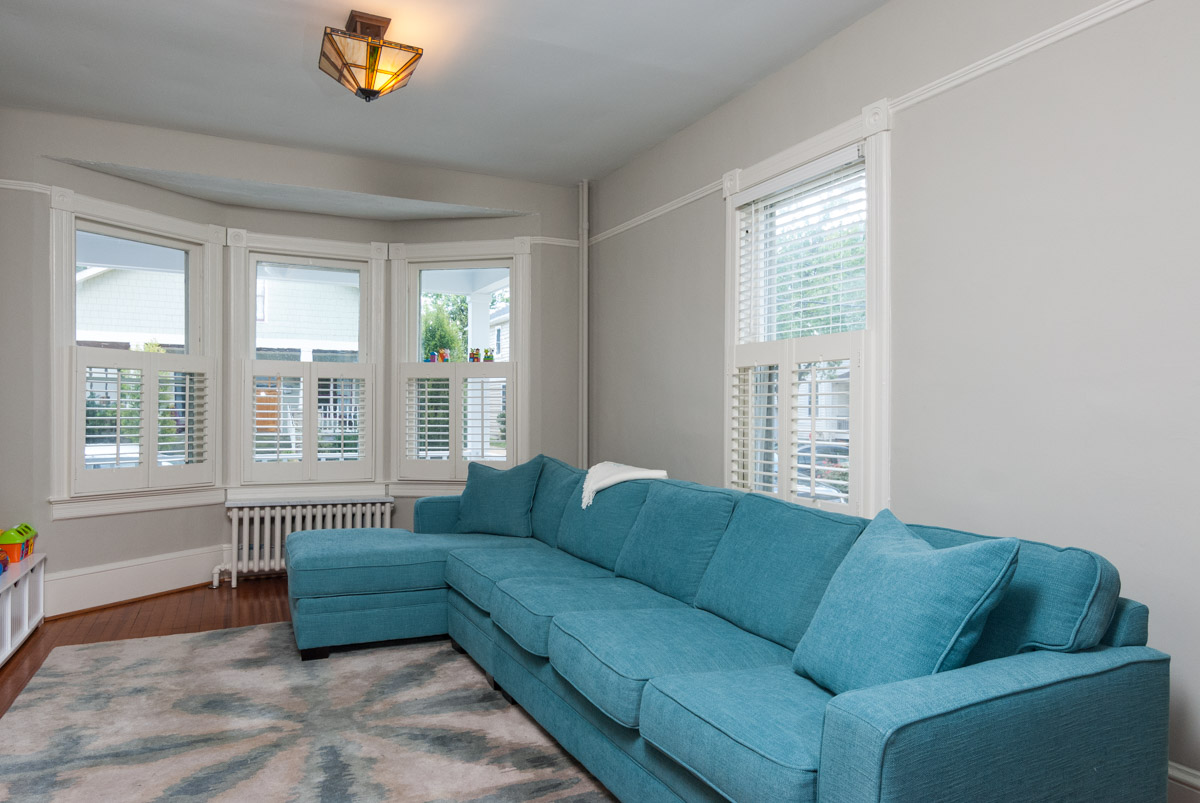
The photo directly below demonstrates what happens when you don't light the adjoining space. Compare it to the photo at the top of this post, and you can see the drastic difference. You definitely don't want an adjoining room to look like a cavernous abyss. That's not inviting at all!

An unlit adjoining room can quickly give a real estate photo that spooky vibe.
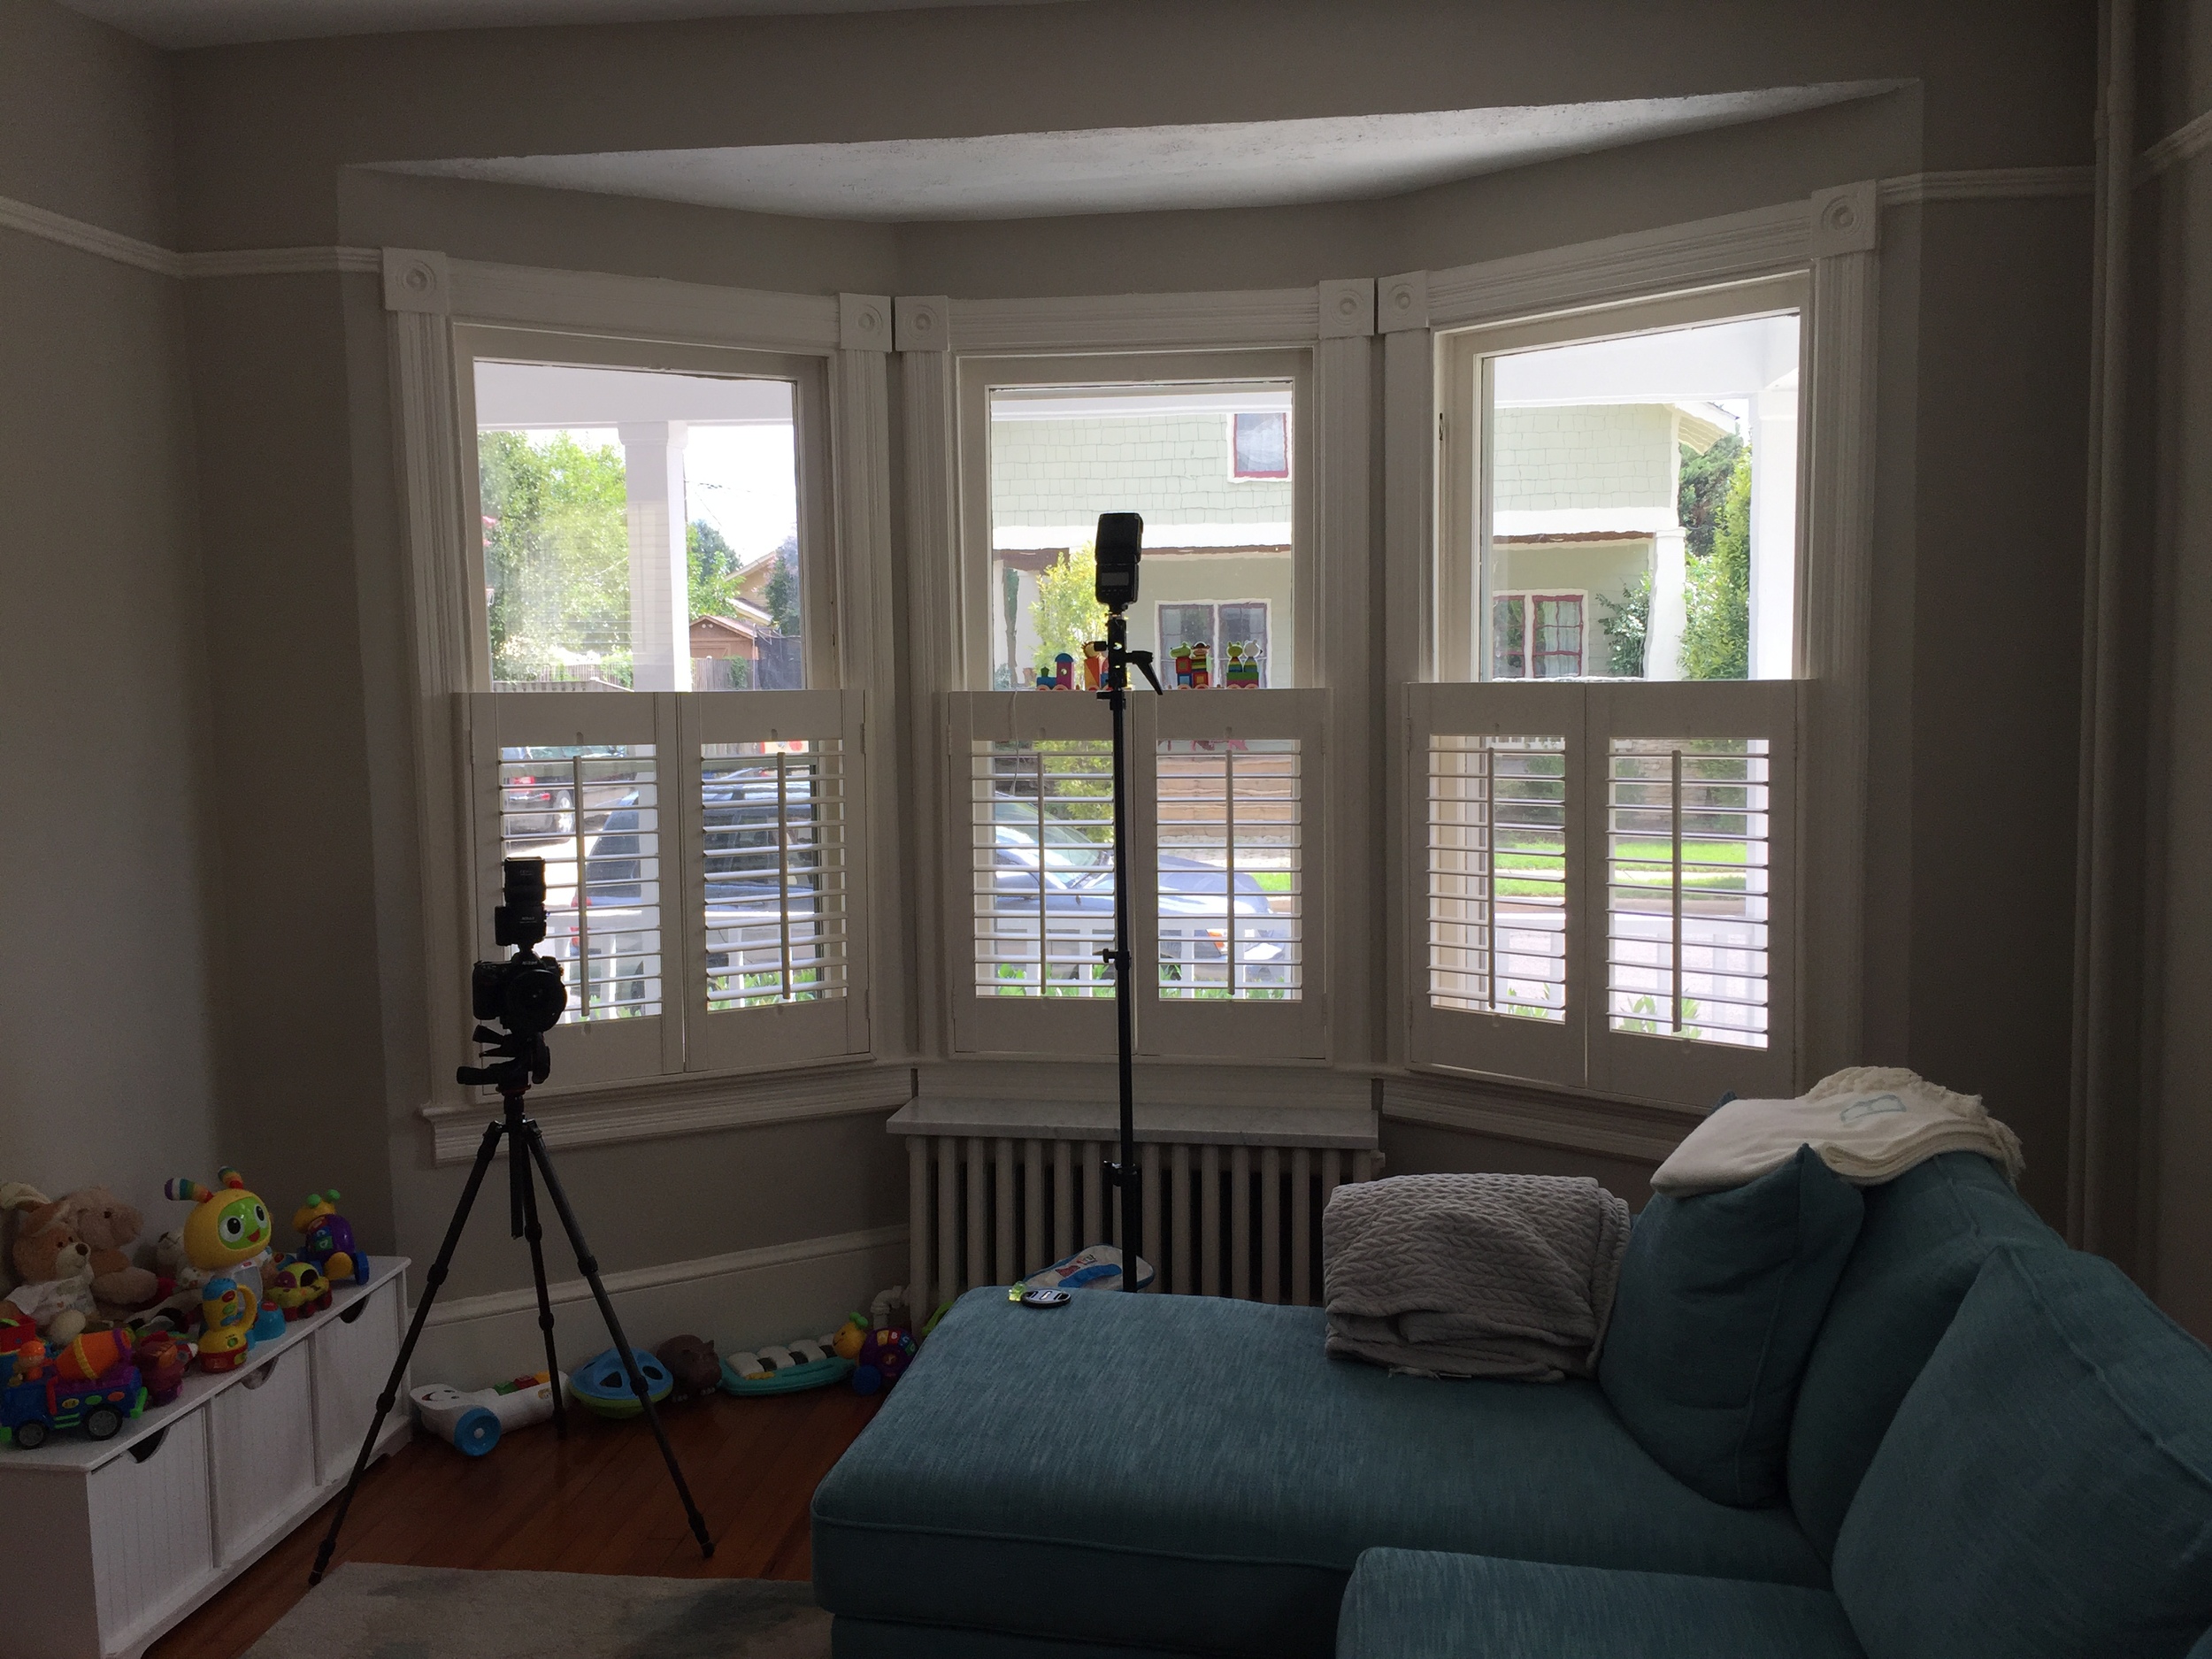
Let's break down the lighting step by step so that you can understand what's going on. I even remembered to take behind-the-scenes photos with my iPhone!
Step 1: Find a good window exposure. Always subjective, but I opted to show less of my neighbor's house by blowing out the windows a bit more than usual.
Main light, bounced into the wall/ceiling joint.
Step 2: Bring up the main room with your first light. In this case, a speedlight placed back camera left, bounced off the wall/ceiling junction above the bay windows.

Main light for adjoining room.
Step 3: Bring up the adjoining room in similar fashion. This was done with another speedlight firing at the junction of two walls out of sight behind the pocket door. Note: pocket doors are awesome, so if you're shooting a room that has them, show them off a bit. Also, the door helped hide my speedlight and lightstand, although I did have a bit of room to play with over there.

Kicker light on a high-end highchair lightstand.
You could pretty much be done there, but I decided to add a third light in the dining room as a kicker. It helped to bring out a little definition in the chairs and kept things from getting too muddy in the table/chairs area.
All of the speedlights were trigged via their built-in optical slaves by another speedlight placed on-camera and aimed at the ceiling. The on-camera speedlight was powered down to 1/128th power so as to not affect the exposure. The nice thing about this is that you can bring up that power level if you decide you need a little fill light. Things were looking pretty good to me, so I opted to keep the power level down and use it only to trigger the other lights.
Even if you're not using lights and such, always remember to pay attention to the adjoining spaces. It can make a big difference in your final images!